Save Multiple Images Dialog
Used to build an image script file that defines the names of the design files, views, output files, rendering options, and image formats of the image files being saved.
You can access this dialog from the following:
You can resize the Save Multiple Images dialog, as well as customize it to display only the information that you require. Script entries are color coded as follows:
Any DGN files that are opened when executing scripts are opened as "read-only".
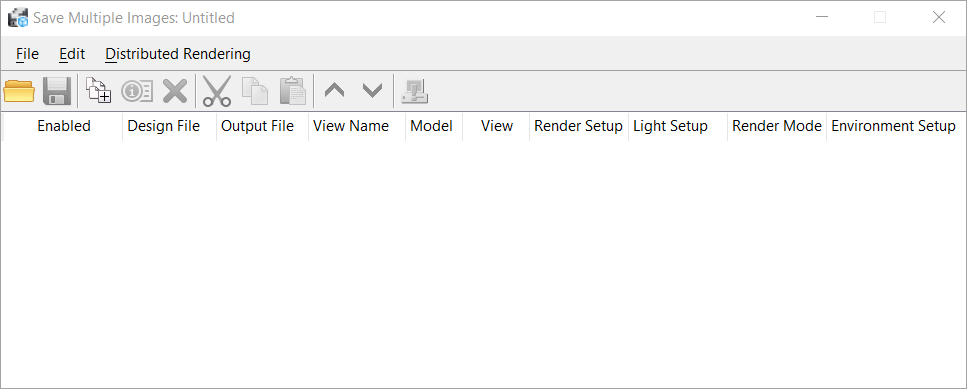
| Setting | Description |
|---|---|
| Open Script icon | Opens the Open Script File dialog, which lets you select an existing script. |
| Save Script icon |
Saves the current script with the current filename.
If the script has not been saved previously, then the Save Script As dialog opens, which lets you choose a name for the script file. |
| New Entry icon | Inserts a new script entry in the list and opens the Edit Script Entry dialog with the default settings. |
| Edit Entry icon | Opens the Edit Script Entry dialog for the current selection. |
| Delete Entry icon | Deletes the current row in the list box. |
| Cut Entry icon | Copies the currently selected script entry to the internal clipboard and then deletes it from the list. |
| Copy Entry icon | Copies the currently selected script entry to the internal clipboard. |
| Paste Entry icon | Pastes the script entry from the internal clipboard as a new entry in the list box. |
| Move Up icon | Moves the currently selected script entry up by one position in the list. |
| Move Down icon | Moves the currently selected script entry down by one position in the list. |
| Execute Script icon | Performs all the tasks of the current script. |
| File > New… | Opens the Create Script File dialog, which lets you create a new (empty) script. |
| File > Open… | Opens the Open Script File dialog, which lets you select an existing script. This is the same as clicking the Open Script icon. |
| File > Save | Saves the current script with the current filename.
This is the same as clicking the
Save Script icon.
If the script has not been saved previously, then the Save Script As dialog opens, which lets you choose a name for the script file. |
| File > Save As… | Opens the Save Script As dialog, which lets you save a script with a new filename. |
| File > Import | Opens the Import Script File dialog, which lets you select another script file to insert into the current script. |
| File > Execute | Performs all the tasks of the current script. This is the same as clicking the Execute Script icon. |
| Edit > New | Inserts a new script entry in the list and opens the Edit Script Entry dialog with the default settings. This is the same as clicking the New Entry icon. |
| Edit > Edit | Opens the Edit Script Entry dialog for the current selection. This is the same as clicking the Edit Entry icon. |
| Edit > Delete | Deletes the current row in the list box. This is the same as clicking the Delete Entry icon. |
| Edit > Cut | Copies the currently selected script entry to the internal clipboard and then deletes it from the list. This is the same as clicking the Cut Entry icon. |
| Edit > Copy | Copies the currently selected script entry to the internal clipboard. This is the same as clicking the Copy Entry icon. |
| Edit > Paste | Pastes the script entry from the internal clipboard as a new entry in the list box. This is the same as clicking the Paste Entry icon. |
| Edit > Move to Top | Moves the currently selected script entry to the top of the list. |
| Edit > Move Up | Moves the currently selected script entry up by one position in the list. This is the same as clicking the Move Up icon. |
| Edit > Move Down | Moves the currently selected script entry down by one position in the list. This is the same as clicking the Move Down icon. |
| Edit > Move to Bottom | Moves the currently selected script entry to the bottom of the list. |
| Distributed Rendering > Use Distributed Rendering | If on, enables distributed rendering for saving the image to disk. |
| Distributed Rendering > Include This Session | If on, the current session of MicroStation will do work in contributing to the rendering. Check this box to improve rendering times but leave it unchecked when you wish to use the current MicroStation session for other work. |
| Distributed Rendering > Options | Opens the Distributed Processing Settings dialog. |
| Right-click menu for script entries | When you right-click on a script entry, the
following menu items are available:
|


