Previewing the Usable Area
Using the Show design in preview check box in the Print dialog, you can review the drawing as it will appear on the printed drawing sheet. When a Windows printer driver is selected in the Print dialog, you have the option to view or hide the usable area in the preview window.
- With the Full check box set, select . If you set the Preview usable area check box you will see the usable area depicted in the preview window. A gray dotted line shows the usable area. If this check box is clear you will only see the physical paper size in the preview window.
- With the Full check box clear, select . If you set the Preview entire page check box you will see the physical paper size, including a gray dotted line showing the usable area, depicted in the preview window. If this check box is clear you will see only the usable area.
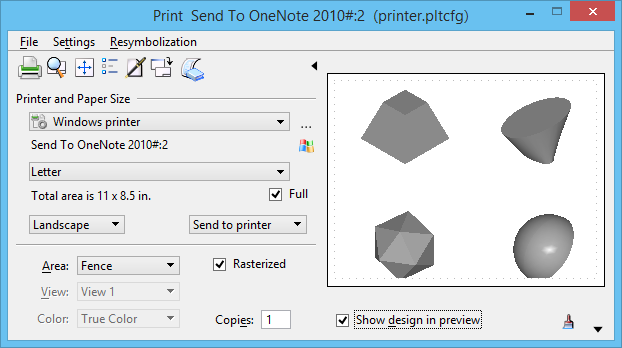
In the image below, the Windows printer and the Full check box is selected, with the Preview usable area check box set in the Print Preferences dialog. The Preview section is displayed, and the Show design in preview is turned on. A gray dotted line shows the usable area.
The Preview usable area and Preview entire page check boxes take effect only when the selected printer driver is a Windows printer driver, that is, the printer.pltcfg printer driver configuration file is being used. Bentley printer driver configuration files (such as hpgl2.pltcfg and pscript.pltcfg) do not contain usable area information. If the Full check box is set for a Windows printer driver, the page rectangle always represents the physical paper size and the non-usable area is always depicted inside it.
The usable area rectangle indicates the effective non-printable area. It may contain regions that you can change from within the product. The usable area consists of the physical paper size minus the driver's non-printable area minus any user-defined Windows page setup margins minus any form offset specified in the printer driver configuration file.
The region between the physical paper size and the usable area is blanked out, using the background fill color. This simulates what the printer will do. Other dashed and solid lines are only drawn if the design is not present in the Print dialog's Preview section. To see these lines, turn off the Show design in preview check box.
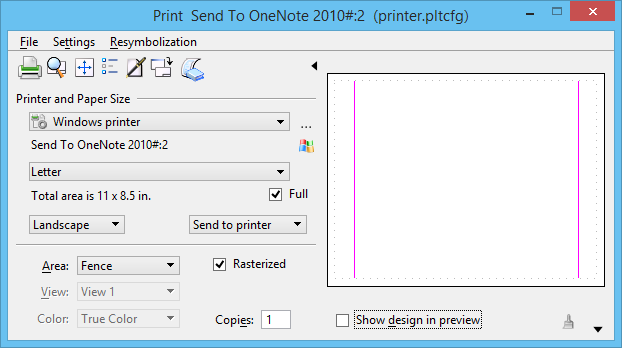
In the image below, the Print dialog with a fenced area selected, a Windows printer driver selected, the Preview section displayed, and Show design in preview turned off. A solid magenta line shows the fenced area and a dashed magenta line shows the print bounding box area.
The print preview line colors may be altered via the following configuration variables. Valid color numbers are: blue = 1, red = 4, magenta = 5, light gray = 8, medium gray = 10, turquoise = 13, dark-green = 14, maroon = 15, dark-yellow = 17.
MS_PLT_PREVIEW_USABLEAREACOLOR — specifies the color of the usable area rectangle in the Preview window.
MS_PLT_PREVIEW_PLOTBOXCOLOR — specifies the color of the print bounding box rectangle in the Preview window.
MS_PLT_PREVIEW_PLOTFENCECOLOR — specifies the color of the print fence shape in the Preview window.