Material Lighting Effects
Rendering relies on the reflection of light off surfaces in the design file. Material definitions include settings for various properties that affect the way that lighting is treated. Using the Material Editor dialog, you can specify settings that determine the appearance of materials in your rendered images, including applying maps.
Many settings are available that affect the appearance of materials. If you pause the pointer over these settings, in the Material Editor dialog, a tooltip displays a description of the setting.
Efficiency
When you are defining materials for photorealism, a primary consideration is the efficiency setting for the material. This should never exceed 100%. Typical materials in the real world generally range in efficiency from 30% to 70%. When you turn on efficiency (Basic Mode) or lock it (Advanced Mode) it will remain at the selected value. As you adjust a material setting that affects the efficiency, then automatic adjustments will be made to the other settings to maintain the selected efficiency.
Diffuse
(Dark/Bright setting in Basic Mode) the intensity of the material's diffuse color — can range from Dark (no diffuse color) to Bright (100% diffuse color).
How the diffuse color is defined depends on the color setting. Click the color menu to see the following options:
Translucency
Translucency controls the amount of light that illuminates the side of the surface opposite the light source. That is, the percentage of incoming light that is transmitted through the material and scattered in all directions as it exits the material.
Specular, Finish, and Reflect
(Dull/Shiny control and Reflective toggle in Basic Mode) These three settings affect materials as follows:
- Specular — sets the amount of incoming light that is reflected in the opposite direction to the incoming light. Values range from 0 (Dull) to 100 (Shiny).
- Reflect — controls the amount of light from other objects that is reflected. Values ranging from 0 (None) to 100 (Full).
- Finish — controls the roughness of the surface, which controls the size of specular highlights. Values range from 0 (Rough, with larger highlights) to 100 (Smooth, with smaller more intense highlights).
The Finish and Specular settings interact to produce specular highlights, or lighting "hot spots," for a material.

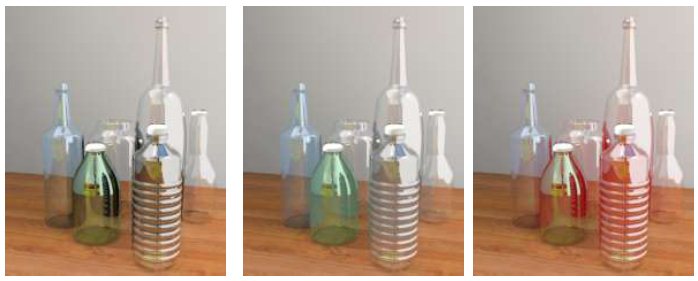
Opacity and Refract
Opacity (Opaque/Clear setting in Basic Mode) sets how much light is transmitted through a material, and its refractive index.
Opacity values range from 0 (clear) to 100 (opaque).
Refract sets the index of refraction for the material. The index of refraction is the ratio of the speed of light in a solid material to the speed of light in air. The index defines how much light bends as it enters a material.
- A value of 1.0 does not bend light at all.
- A value greater than 1.0 causes the light to bend toward the surface normal of the object to which the material is applied
- A value of less than 1.0 causes the light to bend away from the surface normal of the object.
Values for Refract range from 0.10 to 3.00, but refract values for commonly used materials are available from the drop-down menu, which is opened by clicking the arrow icon.

Thickness
This setting can be used to modify the refraction through a surface. For example, it is not uncommon to use surfaces, rather than solids, to model panes of glass in windows. This can cause rendering inaccuracies where refraction is concerned because the light is bent only as it enters the surface. In real-life glass has thickness and the light is bent in one direction as it enters the glass, and again (in the opposite direction) as it exits the glass. In these situations, you can use the Thickness setting to specify that the material has a thickness.
When applied to a solid, then a non-zero thickness would make the solid appear hollow.
Thickness is defined in master units.
Dispersion
Used to create light separation on transmission through a material, such as occurs when light passes through a prism.
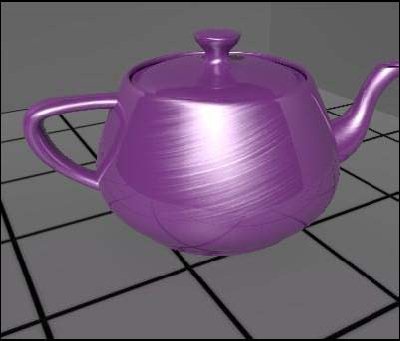
Anisotropy
Anisotropy is the effect produced when a material property is dependent on the direction of incoming light. For example, this occurs when highlights are distorted or accentuated on surfaces with very fine grooves or scratches, as shown in the following example image.
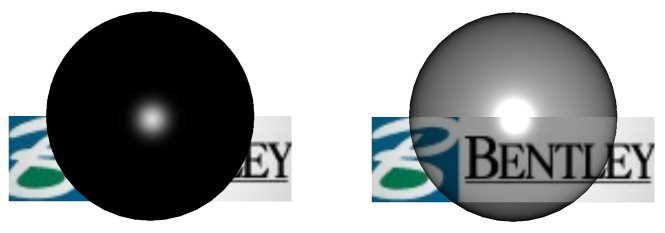
Glow
Defined in lumens per square meter, sets the amount of light that the material appears to emit, adding to the overall reflectance of the material. This is independent of the amount of incoming light. Useful for creating glowing materials such as Neon lights and computer screens. A drop-down menu provides a list of values for common items.
Exit Color
You can set an Exit Color for refraction rays. The Exit Color setting allows you to specify the color Vue returns once it has reached its ray threshold. The color is still attenuated with the initial ray bounces, such as colors, absorption; however, this setting reduces much of the dark areas present with lower refraction depth values. You can set refraction rays to a reasonable termination point improving performance in scenes with many transparent objects without producing unnatural black pixels. The Exit Color is set on the Transparency tab of the Material Editor dialog.