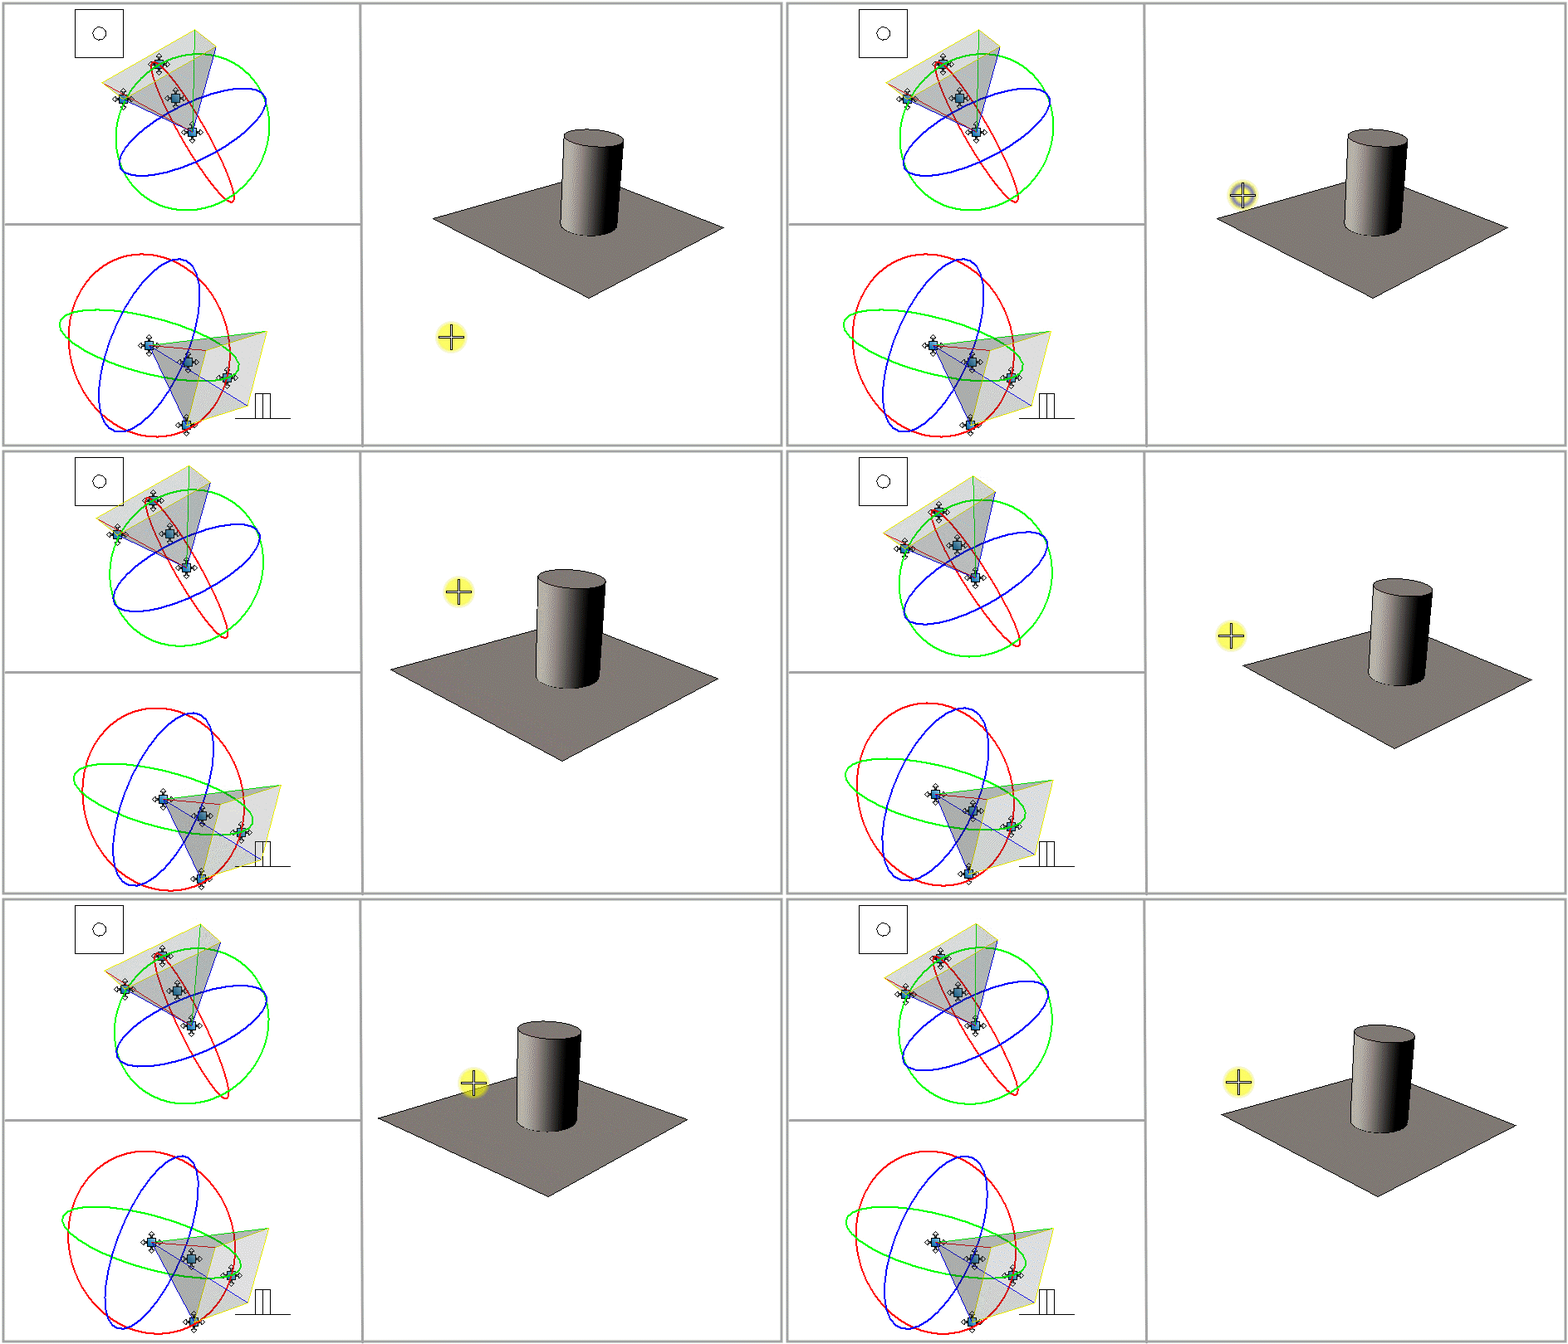
To Pan/Dolly the Camera
- Select the Define Camera tool ( ).
-
In the tool settings window's icon bar, click the
Pan/Dolly icon.

- From the Reference Point option menu, choose Eye.
- Turn on Continuous View Updates and Display View Cone.
- With the pointer in the camera view, enter a data point.
-
Move the pointer:
Up to move forward.
Down to move back.
Left to look left.
Right to look right.
As the pointer moves, the camera view updates dynamically, as does the view cone in other open views.
-
Enter a data point to accept the new view orientation.

Using the Pan/Dolly setting to "walk through"a model. Moving the pointer up or down moves the camera forward or backward. Pointer movement left or right turns the camera in the respective direction.
Note: How the camera revolves is determined by the Reference Point setting. A natural method is to have Reference Point set to Eye, which causes the camera to revolve about the eye point when you move the pointer left or right. This lets you, in effect, turn your head (that is, the camera) by moving the pointer in the direction that you wish to look. When Reference is set to Target, the camera revolves around the target when you move the pointer left or right in the camera view.
