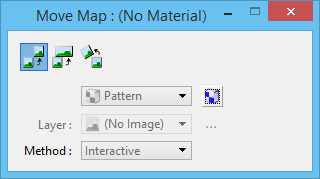
| Map
|
Lets you select the type of map to be adjusted.
- Pattern — (Not
available if no pattern map associated with the material) Lets you adjust the
pattern map associated with the material.
- Bump — (Not
available if no bump map associated with the material) Lets you adjust the bump
map associated with the material.
- Specular — (Not
available if no bump map associated with the material) Lets you adjust the
amount of specular light associated with the material.
- Reflect — (Not
available if no bump map associated with the material) Lets you adjust the
amount of reflection associated with the material.
- Opacity — (Not
available if no bump map associated with the material) Lets you adjust the
opacity associated with the material.
- Translucency — (Not
available if no bump map associated with the material) Lets you adjust the
amount of translucency associated with the material.
- Finish — (Not
available if no bump map associated with the material) Lets you adjust the
roughness of the material.
- Diffuse — (Not
available if no diffuse map associated with the material) Lets you vary the
amount of incoming light that is reflected in all directions equally; affects
the overall brightness of the material.
- Glow — (Not
available if no glow map associated with the material) Lets you vary the amount
of light the material appears to emit.
- Clearcoat — (Not
available if no clearcoat map associated with the material) Lets you vary the
amount of clearcoat lacquer effect on the material.
- Anisotropy
Direction — (Not available if no anisotrophy map associated with the material)
Lets you vary the direction of the scratches on the surface; you can specify
an anisotropy map to vary the anisotropic direction.
- Refraction
Roughness — (Not available if no refraction roughness map associated with the
material) Lets you vary the number of refraction rays that are used to create
the blurring.
- Specular Fresnel —
(Not available if no fresnel map associated with the material) Lets you vary
the amount of Fresnel, which increases the specular value when light hits a
surface at a glancing angle.
- Specular Color —
Lets you vary the specular color according to the image you select.
- Transparency Color
— Lets you vary the transparency color according to the image you select.
- Sub Surface Color —
Lets you vary the sub surface color according to the image you select.
- Glow Color — Lets
you vary the glow color according to the image you select.
- Reflect Color —
Lets you vary the reflection color according to the image you select.
- Displacement — (Not
available if no displacement map associated with the material) Lets you vary a
displacement map for a material.
- Normal — (Not
available if no normal map associated with the material) Lets you vary a normal
map for a material.
- Geometry — (Not
available if no geometry map associated with the material) Lets you vary the
geometry map associated with the material.
|
| Open Map Editor icon
|
(Not available if no map associated with the
material) Opens the
Map Editor dialog for the Pattern or Bump map.
|
| Layer
|
(Multi-layer materials only) Option menu that lets
you choose a single layer to manipulate. To manipulate multiple layers as a
group, use the Layer Chooser.
|
| Layer Chooser (icon)
|
(Multi-layer materials only) Opens the Layer
Chooser dialog, which lets you choose multiple layers to manipulate as a group.
|
| Method
|
Lets you choose the method of moving/scaling maps.
- Interactive — Lets
you adjust a pattern/bump map interactively in a view.
- Absolute — Lets you
adjust a pattern/bump map by selecting a reference point on the image and then
defining the required location for that point on the element.
- 3 Points — (Scale
Map only) Lets you define the scaling by three points — origin, reference, and
scale amount.
|
| Lock (scale) icon
|
(Scale Map only) Lets you lock the x, y, and z scale
values.
- On (locked) —
Scaling of the map is applied to the x, y, and z axes of the map.
- Off (unlocked) —
Scaling is applied only to the axes defined by the data points.
|
| Move Map (icon)
|
Lets you adjust the position of a pattern/bump map.
|
| Scale Map (icon)
|
Lets you scale a pattern/bump map. When you select Scale
Map, a lock icon appears to the right of the Method menu. This lets you lock
the x, y, and z scale values.
|
| Rotate Map (icon)
|
Lets you rotate a pattern/bump map.
Note: Rotate Map is
not supported for 3D procedural maps.
|
 Used to interactively
adjust the size, position and orientation of a pattern map or a bump map.
Used to interactively
adjust the size, position and orientation of a pattern map or a bump map.