Point Clouds Dialog
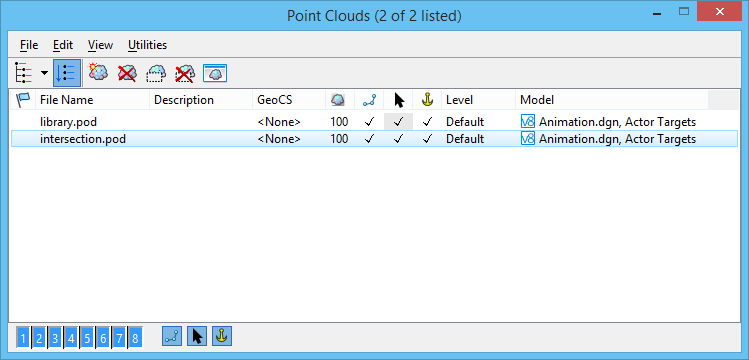
 Used to manage the display of one or more point clouds in a DGN file view. The list box shows all the point cloud files attached to the DGN file. Selecting a point cloud file from the list adds it to the element set.
| Setting | Description |
|---|---|
| Show Hierarchy | When on, displays a tree that shows the active file and references that are directly attached to it. When the tree is turned off, you can use the arrow button next to the Show Hierarchy icon to list the active file and any references that are directly attached to it. |
| Flat Mode | When Flat Mode is on and an active design is selected in the Hierarchy pane, all references attached to the active design and its nested references are listed in the right pane. When Flat Mode is on and a referenced DGN is selected in the Hierarchy pane, all references attached to that DGN and its nested references are listed in the right pane. |
| Attach |
Opens the Open dialog, which allows you to attach a point cloud. <Ctrl+click> to attach multiple point clouds simultaneously. Only POD files can be attached to a design file. For all other supported file formats, such as LAS, the Convert dialog opens. This dialog allows you to choose the desired conversion options and to save the selected point cloud file as a POD file. |
| Detach | Detaches the point cloud. |
| Clip | Opens the Clip Point Cloud tool, which allows you to hide points of the cloud. |
| Delete Clip | Deletes a clip from a point cloud. |
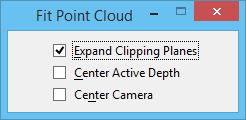
| Fit Point Cloud to View |
Fits one or more point cloud images to a view(s).
|
| Status | Displays the status of the point cloud. Options are Loaded, Referenced, Self-Referenced or Point Cloud Not Found. When a file is not found, a warning icon displays. Pause the pointer over the warning icon to display a tooltip with an explanation of the problem. |
| File Name | Displays the file name. Double-clicking the file name opens the Properties dialog. |
| Description | Displays a description of the point cloud. |
| Density | This editable field indicates the density of points used to display the selected point cloud.
You can use the POINTCLOUD DENSITY <density value> key-in to change the density of all the point clouds in the active model. The density value is a number between 1 and 100. For any point clouds that have a density less than 1, then 1 is used; for any over 100, then 100 is used. |
| Snap | If on, you can snap to elements in the point cloud. A check mark in the column indicates that Snap is on. |
| Locate | If on, you can select elements in a point cloud for construction purposes. A check mark in the column indicates that Locate is on. |
| Anchored | When on (the default), the point cloud cannot be moved, scaled or rotated. Anchored is on or off depending on the point cloud status in the original file. |
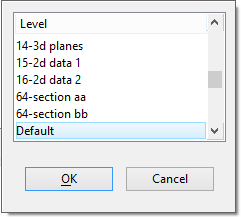
| Level | Shows on which level the point cloud is located. Double-clicking on this column displays a drop-down list box that lets you change the level for the selected raster. |
| Model | The Model field is used to display the origin (design name and model name) of the point cloud reference. |
| Right-Click Menu (list box) | Right-click the title bar of the list box to get all the options for the list box as well as the option to Save Layout. By default, Status, Level and Model are hidden. |
| View buttons | Numbered push buttons let you define in which view(s) to display the point cloud(s). |
| Snap | Allows you to turn on or off the Snap functionality. If the icon is pressed, the setting is on. |
| Locate | Allows you to turn on or off the Locate functionality. If the icon is pressed, the setting is on. |
| Anchored | Allows you to turn on or off the Anchored functionality. |
| Same as clicking the Attach icon. | |
| Same as clicking the Detach icon. | |
| Opens the Select Files to Convert dialog, which allows you to select a file (other than a POD file) to convert. Once you select a file, the Convert dialog opens. The Convert dialog varies according to the type of file selected. | |
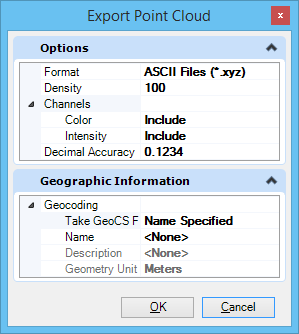
Opens the Export Point Cloud dialog, which allows you to export and save to the XYZ, LAS, or POD format.
|
|
| Same as clicking the Clip icon. | |
| Same as clicking the Delete Clip icon. | |
| Same as clicking the Show Hierarchy icon. | |
| Same as clicking the Flat Mode icon. | |
| Opens the Select Geographic Coordinate System dialog, allowing you to browse the GCS Library and select the desired option. | |
| Deletes the currently assigned Geographic Coordinate System. | |
| Right-Click Menu | A right-click menu offers options for the following operations related to the point cloud.
|


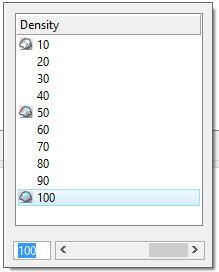
 For low density, set at 10.
  For medium density, set at 60.
  For high density, set at 100.