Parametric Modeling Workflow - Designing Parametric Doors and Generating Doors Schedule
In this scenario, let us go through a simple parametric modeling workflow, where you will first create a parametric door with variations based on door size. Then, multiple instances of this door will be placed as a cell, that too at different sizes, based on their variations. Let us then attach business properties in the form of item types to these doors. These properties will be then used to generate data-rich reports containing information such as door type and door number.

Creating Variables and Variations and Applying Dimension Constraints
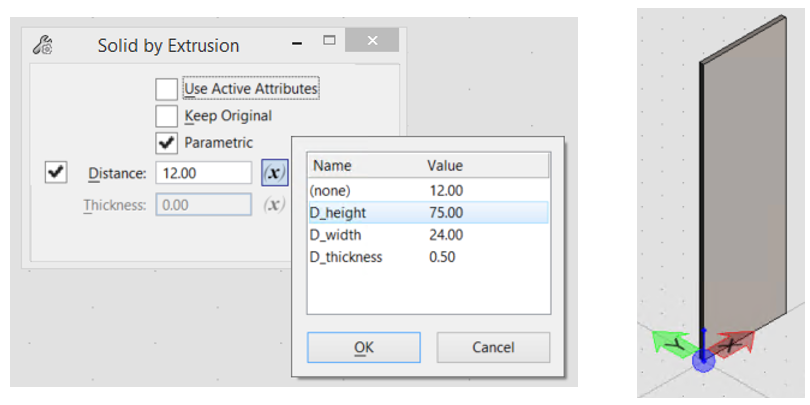
- Create variables for door height, width, and thickness. As shown in the image below, the variables are D_height, D_width, and D_thickness for height, width and thickness of the door respectively.
- Add variations for different door sizes. In this example, following are the variations and their variable values:
- Apply the D_width constraint to the width of the block.
- Extrude the block. Apply D_height constraint while extruding the block.


Try applying different variations. You will observe that the door size changes with variations.
Placing the Parametric Door
Once you create the parametric door, attach it as a cell library to your design file.

Creating and Attaching Item Types
- Open the Item Types dialog.
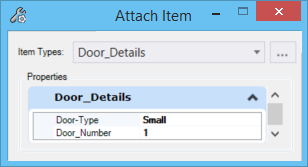
- Create an Item Type called Door_Details.
- Add the following item definitions:
- Save the item type.
- Start the Attach Item Type tool.
- In the Attach Item tool settings window:
- Before selecting the next door, change the Door_Number and Default Value properties and select the next door.
- Repeat step 7 for all the doors in the model.

Creating a Report Definition of Doors
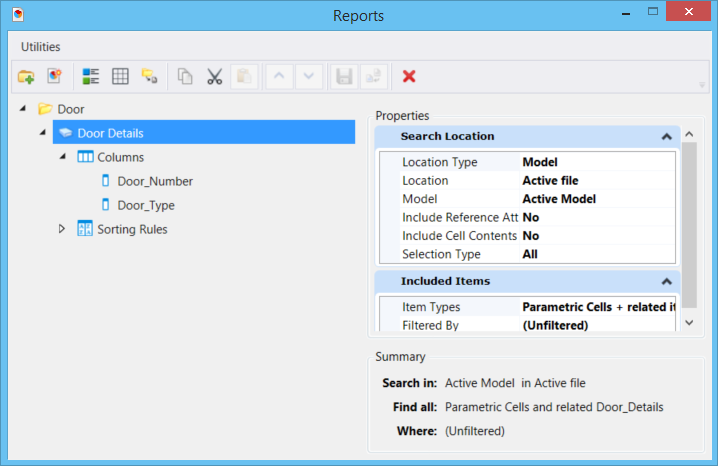
Viewing and Generating Reports
- Once you are done with adding columns, click the Preview results icon in the Reports dialog.
- To know the number of doors of each size, just drag the Door_Type column to the Grouped by section.
- To place the report as a table, click the Place Table icon in the Reports dialog and enter a data point to place the table.


