To Set Up a Batch Conversion Job
- Open the Batch Converter dialog ( ).
-
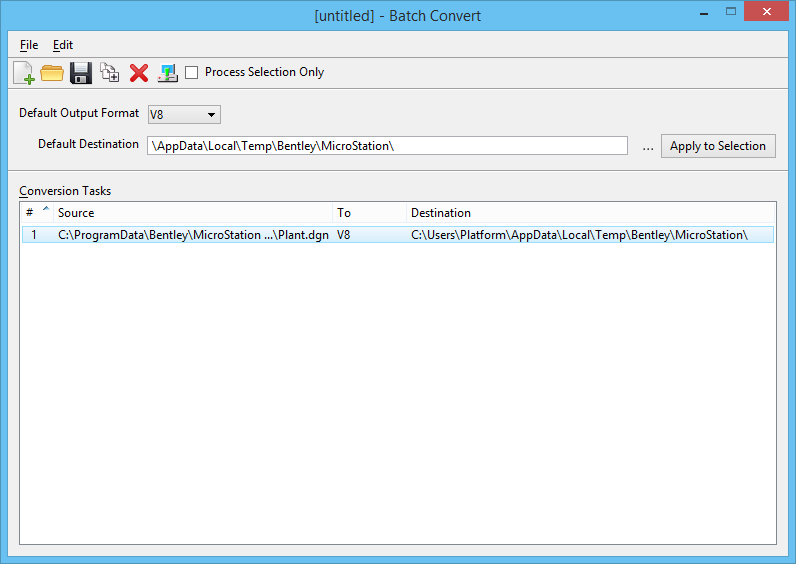
From the Default Output Format list box, select the default file
format for the conversion.
After you select files and directories to convert (steps 4–7), you can modify the output format for any of the source files.
-
Do one of the following:
In the Default Destination text box, enter the path to the destination directory for converted files. If you specify a directory that does not yet exist, MicroStation will create it when it processes the job.
or
Click the browse icon, and browse to the destination directory.
After you select files and directories to convert (steps 4–7), you can further modify the destination directories.
-
In the dialog's icon bar, click
Add Files or
Directories to Convert.
The Select Files and Directories to Convert dialog opens. This dialog allows multiple selection of both files and directories.
- Select individual files or directories to convert.
-
Click
Add.
The specifications for the selected directories or files are listed in the Selected Files list box.
- (Optional) To remove a selected directory or file, select it in the list box and click Remove.
- Repeat steps 5–6 until you have selected all the directories and files to convert.
-
Click
Done.
The Select Files and Directories to Convert dialog closes, and the Conversion Tasks list box in the Batch Convert dialog updates to reflect your selections. Now you can edit individual task entries in the Conversion Tasks list box.
- (Optional) To remove a task, select the task and click the Remove Files icon.
- (Optional) Do one of the following:
- (Optional) In the File column, add the wildcard string *\ to the end of a directory to indicate that subdirectories will be included. In the File column, designate that specific file types in the subdirectories will be included. For example, to process all files with the extension .dgn from directory c:\projects\ and its subdirectories, edit the entry to read c:\projects\*\*.dgn.
- (Optional) Set the output format and destination directory for an individual task by changing the Default Output Format and Default Destination settings, selecting the task in the list, and clicking Apply to Selection.
- (Optional)
Define the conversion options for individual files. Select a file,
then select
. For example, if a file is to be output in V8 format,
select
.
Note: If this step is not performed, the most recent settings for the particular file format will be used.Tip: Because the output file timestamp is set to match the source file timestamp, it is feasible to run a job frequently, updating the output versions of only those source files that have changed. It also makes it possible to restart a batch conversion job. When the destination file is up to date, the Status column indicates that fact.Note: If MicroStation files are being converted to AutoCAD files and Save References As DWG/DXF is on in the DWG Save Options dialog, the references of each source file are processed as well as the master file. In certain instances, this results in the automatic conversion of some files that are selected as source files in a subsequent task in the same job. When processing reaches such a file, its status changes to "Already Converted."
When feasible, output files are assigned the same filename as the source file. The output file timestamp is set to match the source file timestamp. When the source is in a MicroStation format and the output is an AutoCAD file, the output extension is automatically set to *.DWG or *DXF as appropriate (all AutoCADfiles must have the .DWG or .DXF extension). If there are multiple files with the same root name (differing only in extension) in the source directory, the extension is incorporated into the output file name.