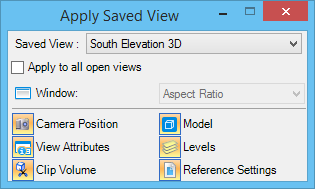
Apply Saved View
 Used to apply the saved
view to the selected view or all open views.
Used to apply the saved
view to the selected view or all open views.
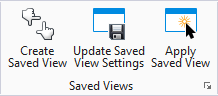
You can access this tool from the following:
When saved views created in editions prior to MicroStation V8i are imported and applied, their view display may not appear correctly.
If the saved view's name contains a double quotation mark, the double quotation mark must be preceded by a backslash. In the following example, the view name contains a double quotation mark and spaces. If the view is named Scale 1/4" =1', use the key-in VI=Scale 1/4\" = 1'.
In the key-in syntax, the following switches are valid. If no switches are specified, the command uses the default options: Camera Position, Levels, and View Attributes.
| Switch | Description |
|---|---|
| -p | Use current preferences from the Saved Views dialog. Any other switches are ignored. |
| -c | Apply Camera Position |
| -a | Apply View Attributes |
| -v | Apply Clip Volume |
| -l | Apply Levels |
| -r | Apply Reference Settings |
| -wa | Apply Window Aspect Ratio |
| -ws | Apply Window Size |
| -wp | Apply Window Size and Position |
Examples:
- VI=My View — Applies My View with the default options; asks you to enter a data point to select the view.
- VI=My View,2 — Applies My View with the default options to view number 2.
- VI=My View,2 –p — Applies My View using the current preferences to view number 2.
- VI=My View,2 –l — Applies only the Levels setting from My View to view number 2.
- VI=My View,2 –cv — Applies the camera position and the clip volume from My View to view number 2.
- VI=My View,2 –cv –wa — Applies the camera position and the clip volume from My View to view number 2, and also matches the view window to the aspect ratio of the saved view.
- VI=My View,2 –cavlr –wp — Applies all of the view settings from My View to view number 2.