Actions for Display Rules
You can assign one ore more actions to display rules. These actions are executed if the set conditions are met for the display rules.
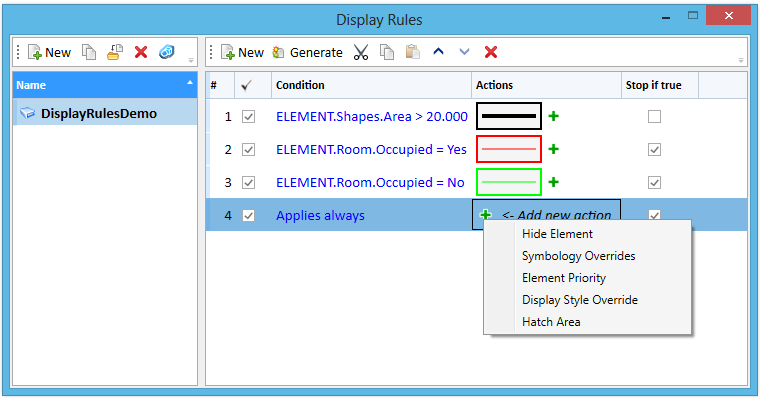
 displays following action options:
 You can turn on the required actions and then make required settings for each of the actions. The details of each action option are described below.

Symbology Overrides
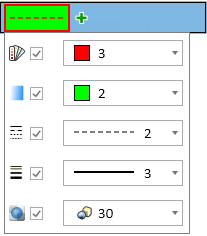
If on, you can set the symbology overrides. Selecting the icon opens a window with following options:
-
 Element color override - Turn on the Enable/disable element color override check box. Selecting the drop-down list next to the check box opens the Active Color dialog from which you can select the desired element color override.
 -
 Fill color override - Turn on the Enable/disable fill color override check box. Selecting the drop-down list next to the check box opens the Active Color dialog from which you can select the desired fill color override.
 -
 Line Style override - Turn on the Enable/disable line style override check box. Select the desired line style override from the drop-down list next to the check box.
 -
 Line weight override - Turn on the Enable/disable line weight override check box. Select the desired line weight override from the drop-down list next to the check box.
 -
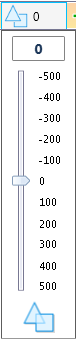
 Element transparency override - Turn on the Enable/disable element transparency override check box. Selecting the drop-down list next to the check box opens the transparency slider using which you can select the desired transparency override.
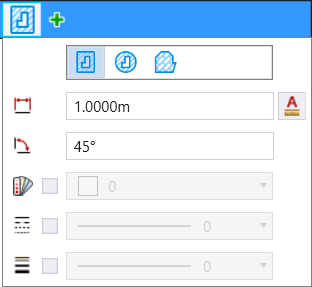
Hatch Area
If on, you can apply hatching or patterning to the area that passes the set condition. Selecting the icon opens a window with following options:
-
 Hatch - If on, hatches an area.
 -
 Crosshatch - If on, crosshatches an area.
 -
 Pattern - If on, applies pattern to an area.
 -
 Spacing - Sets the interval between the hatching lines. If crosshatch is turned on, sets the interval between the rows and the columns of the crosshatching. For crosshatching, you can turn on the lock
  to lock the spacing between the primary and secondary hatching lines.
 -
 Annotation Scale - Sets the Annotation Scale Lock. When this lock is on, the annotation scale is applied to the hatch.
 -
 Angle - Sets the angle at which hatching lines are drawn. By default, the angle is relative to the view being used. Where AccuDraw is active, however, the angle is relative to the AccuDraw drawing plane. For crosshatching, you can turn on the lock to lock the angle between the primary and secondary hatching lines.
 - Enable/disable element color override - If on, the color of hatch lines is overridden with the color selected from the drop-down list next to the check box.
- Enable/disable line style override - If on, the line style of hatch lines is overridden with the line style selected from the drop-down list next to the check box.
- Enable/disable line weight override - If on, the line weight of hatch lines is overridden with the line weight selected from the drop-down list next to the check box.
-
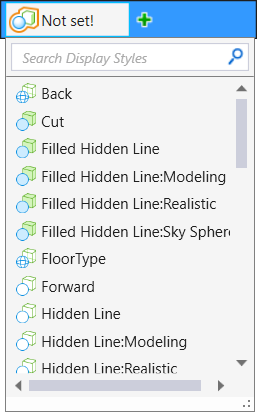
 Select a cell - (Available for Pattern only) If you want to place a cell as a pattern, select the desired cell from this drop-down list. The drop-down list displays all the shared cells as well as attached cells. Clicking the Open cell library dialog icon next to the drop-down list opens the Cell Library dialog from where you can attach another cell library. The symbology overrides will be available only for point cells.
 -
 Change Pattern Scale - (Available for Pattern only) Sets the factor by which the pattern cell is scaled.