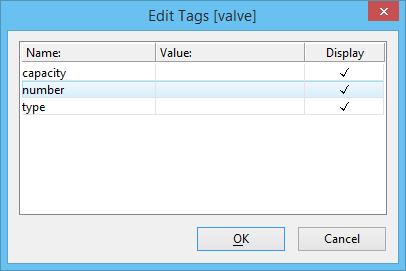
To Edit Tags
- Select the Edit Tags tool.
- Do one of the following:
-
Accept the tag or element.
If an element is selected and tags from more than one tag set are attached to that element, the Edit Tags dialog opens and shows the names of the tag sets to which the attached tags are members — continue with step 4. Otherwise, a different Edit Tags dialog opens; its title bar identifies the tag set, and its list box shows the name, value and display status of each tag in the set — skip to step 6.
- In the Edit Tags dialog, select the tag set whose member tags you want to edit.
-
Click OK.
A second Edit Tags dialog opens. Its title bar identifies the tag set you selected. Its list box shows the name, value, and display status of each tag in the set.
- In the list box, select a tag to edit.
- (Optional) If the tag value is variable, to edit it, type the new value in the Value field.
- (Optional) To keep the tag from being displayed, turn off its Display setting by clicking the check box.
- Repeat steps 6-8 for each additional tag you wish to edit.
-
Click OK.
Tip: Double-clicking a tag with the Element Selection tool pointer opens the Edit Text dialog for editing that tag. Proceed with step 7 in the above procedure.

