| Style
|
Consists of controls that can be used to set active
Text Style, Font, Height, Width, and Underline.
- Text Style -
Sets the text style that controls the
presentation of dimension text. Dimensions placed using a text style are
automatically updated when the text style is modified.
Using a text style lets you take advantage of
advanced text style properties that are not otherwise available for dimensions,
such as italics and background color.
Some text attributes can be directly
controlled by the dimension style. For example, if the text height and width
are set on the dimension style, these values are used instead of the height and
width of the text style.
- Font -
If on, sets the dimension text font. Use the
menu to select the font. The font at the top of the list is the font from the
active text style.
If off, the font matches the font in the active
text style.
Key-in:
DIMENSION FONT [ACTIVE |
<value>
- Height -
If on, sets the dimension text height. In the
field, enter a new height value.
If off, the height matches the height in the
active text style.
- Width -
If on, sets the dimension text width. In the
field, enter a new width value.
If off, the width matches the width in the
active text style.
- Annotation Scale
Lock -
Displays the status of the Annotation Scale
lock: on or off. If on, all the dimension text is placed at the defined
Annotation Scale.
- Underline -
If on, underlining is determined by the
dimension style. Select On or Off to set underlining for the dimension style.
If off, underlining is determined by the text
style rather than the dimension style. The adjacent option menu, though
disabled, indicates whether the text style specifies underlining On or Off.
|
| Format
|
Controls the placement of dimension text.
- Orientation -
Sets the orientation of dimension text relative
to the dimension line: Aligned or Horizontal.
- Aligned —
Aligns the text with the dimension line.
- Horizontal —
Displays the text horizontally, regardless of the orientation of the dimension
line.
- Location -
Sets the location of the text relative to the
dimension line.
- Inline — Aligns
the text with the dimension line.
- Above — Places
the text above the dimension line.
- Outside —
Places the text to the opposite side of the extension origin.
- Top Left —
Places the text to the top left of the origin of the extension line.
Dimensions with Text Location
set to Inline (upper left), Above (upper right), Outside (lower left), and Top
Left (lower right)
- Justification -
Sets the justification of dimension text—Left,
Center Left, Center Right or Right justified.

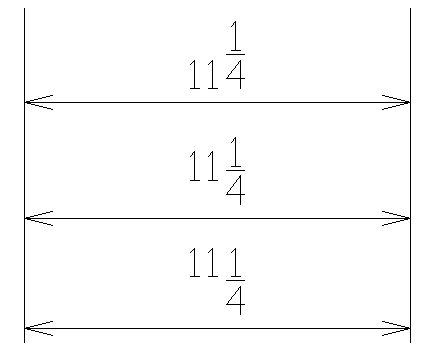
Dimension Text Justification
From top: Left, Center, Right
Note: When the
element is too small to fit the dimension within the extension lines, the
dimension text is positioned to the left or right based on Center>Left or
Center>Right justification.
Left:
Dimension text positioned Center Left| Right: Dimension text positioned Center
Right
Key-in:
DIMENSION JUSTIFICATION [CENTER | LEFT|
RIGHT]
- Text Frame -
Sets the framing of dimension text:
- None — No
frame.
- Box — Places
dimension in a box. Sometimes used to designate a reference dimension.
- Capsule —
Places dimension in a capsule. Typically used to designate a dimension for
quality control.
Key-in:
DIMENSION TEXT BOX [OFF | ON |
TOGGLE]
or
DIMENSION TEXT CAPSULE [OFF | ON |
TOGGLE]
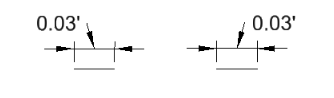
- Left Margin -
Sets the space, in text height units, between
the leader line and the dimension text.
- Lower Margin -
Sets the space, in text height units, between
the dimension line and the bottom of the dimension text.
|
| Stacked Fractions
|
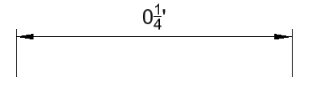
Controls the format for stacked fractions.
- Enable -
If on, the dimension settings control the use of
stacked fractions. Select On from the menu, then modify the stacked fractions
settings.
If off, the stacked fractions settings are
controlled by the text settings.
SET
STACKFRACTIONS
[
OFF |
ON |
TOGGLE ]
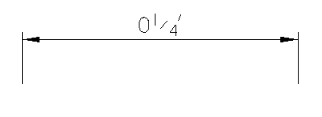
- Type -
Sets the fraction type.
- From Font —
Sets the fraction type is derived from the font. Not valid for True Type fonts.
- Horizontal —
Sets the fraction line horizontally. Valid for all font types.
- Diagonal — Sets
the fraction line diagonally. Valid for all font types.
- Alignment -
Sets the alignment of the text at the top,
center, or bottom of the fraction, relative to the divisor line.
Top:
alignment set to Top. Middle: alignment set to Center. Bottom: alignment set to
Bottom.
- Scale -
Sets the stacked fraction text size, specified
as a multiple of the dimension text height and width.
Note: When placing
dimension text, the default behavior has a space between the fraction and the
unit symbol (i.e., for inches). To place dimension text without the space
between the fraction and the unit symbol, turn off the Non–Stacked Fraction
Space property (Dimension Styles>Advanced
Tab>Units>Primary>Non-Stacked Fraction Space).
|
| Notes
|
Contains controls that are used to set the
appearance of the leader and text used by the Place Note tool.
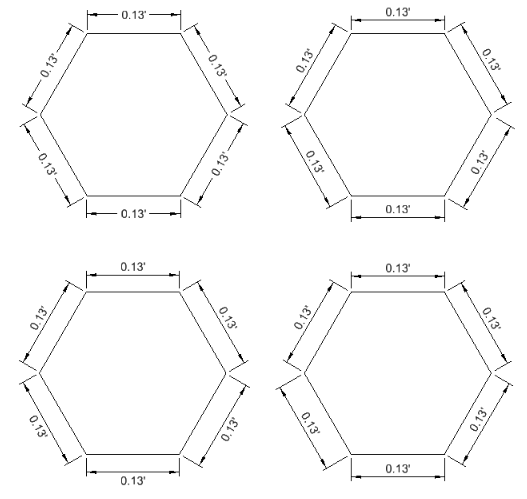
- Leader Type -
Sets the type of leader: Line or Curve.
- Terminator -
Sets the type of terminator to display: none,
arrow, slash, empty ball, or filled ball. The last symbol lets you set the
terminator type to the Note symbol defined in the
Geometry tab, Terminators Symbols.
- Text Frame -
Sets the type of frame (if any) — None, Line,
Box, Rotated Box, Circle, Capsule, Hexagon, Rotated Hexagon, Triangle,
Pentagon, or Octagonal.
- Frame Scale -
Allows for text frames to be scaled. If on, you
can specify the size of the text frame by entering a scale factor. If off, the
frame automatically scales around the text.
- In-line Leader -
If on, places the note with an inline leader (a
segment of a leader that is aligned with the text).
In the field, enter a length, in text height
units, for the inline leader.
If off, an inline leader is not placed.
- Left Margin -
Defines the distance, in working units, between
the endpoint of the leader and the text.
- Lower Margin -
Defines the distance, in working units, between
the top and bottom margins of the text, and the top and bottom edges of the
text frame (if used).
- Text Rotation -
Sets the rotation of the text relative to the
leader line: Horizontal, Vertical, or In-line.
- Horizontal
Attachment -
Defines how the note text is attached to the
leader.
- Auto — Attaches
either the right or left side of the note text to the end of the leader line,
depending on the position of the cursor relative to the start point for the
note.
- Left — Attaches
the left side of the note text to the end of the leader line.
- Right —
Attaches the right side of the note text to the end of the leader line.
- Edit About -
Sets the position of the vertical origin to
edit text about. If you edit the text note later, the text is edited about this
point. To see this edit point, turn on the Text Nodes view attribute (
).
- Top — Sets the
edit point at the top of the text.
- Center — Sets
the edit point at the center of the text.
- Bottom — Sets
the edit point at the bottom of the text.
- Dynamic — Sets
the position of the edit point depending on the position of the text relative
to the leader line.
|
| Justification and Leader Attachment
|
For multiple lines of text, controls justification
and where the leader is attached to the text. Each time that you modify these
options, the graphic updates to preview the multiline justification and leader
attachment.
The top row of buttons controls text justification.
The buttons on the left and right sides of the preview graphic define the
position where the leader line is attached to the text.

Dimension
Settings, Place Note Justification settings
- Justification
buttons -
Set the justification for multiple rows of text:
- Dynamic
Justified — Aligns multiple lines of text based on the relationship between the
last and the next to last data points. For example, if the next to last data
point is to the right of the last data point, the text is right justified.
- Left Justified
— Aligns multiple lines of text along the left side.
- Center
Justified — Aligns multiple lines of text along the left/right center.
- Right Justified
— Aligns multiple lines of text along the right side.
- Left side leader
arrow attachment -
Defines where a leader is attached to the left
side of multiline text. To change the attachment point, click on the preview
graphic or use the arrow buttons.
- Right side leader
arrow attachment -
Defines the how a leader is attached to the
right side of multiline text. To change the attachment point, click on the
preview graphic or use the arrow buttons.
|