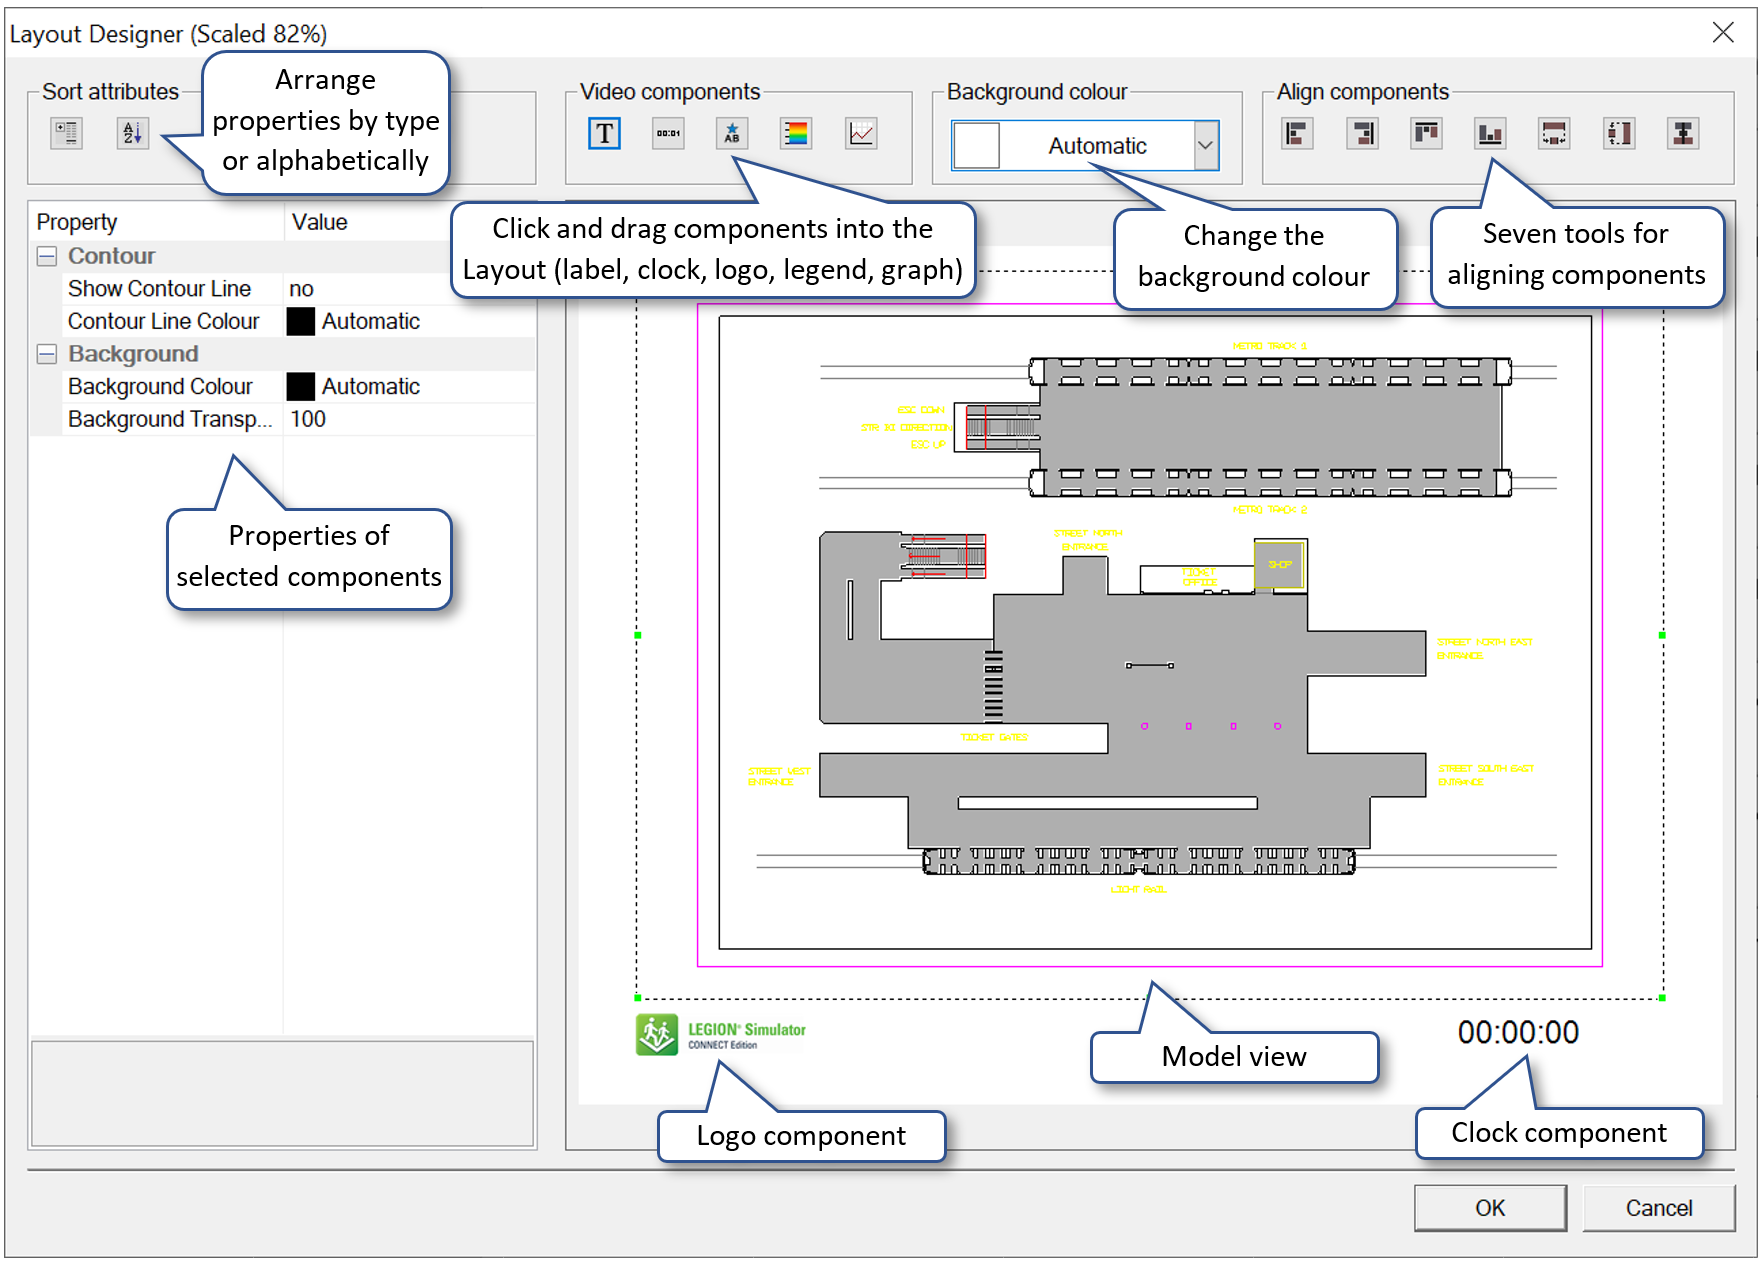
Customising the AVI Layout
The ‘avi’ Layout Designer is accessible from the ‘AVI’ tab of the Record .AVI track properties dialog box and enables you to organise the look of the recorded video. Here you can change, resize, and reposition the model view, caption, clock, and logo.
To customise the AVI Layout:
- On the AVI tab of the ‘Record .AVI Track Properties’ dialog, click the Layout button. The Layout Designer is displayed and already contains a view of your model, the LEGION logo, and a clock.
- To add any of the customizable items in the ‘Video components’ toolbar, click and hold the relevant icon and drag into the Layout Designer. Position and resize the items according to preference.
- To change the properties of
a label, clock, logo, legend, or graph, click on the item to select it and
change the properties in the left-hand panel of the dialog box. Change
properties in the ‘Value’ column by entering text directly, browsing for files
or selecting values from drop-down lists.
 – Label: Insert text Label into
the Layout.
– Label: Insert text Label into
the Layout.
 – Clock: Add a simulation clock
display to the Layout.
– Clock: Add a simulation clock
display to the Layout.
 – Logo: Browse to select an
alternative logo image.
– Logo: Browse to select an
alternative logo image.
 – Legend: Adds a legend for the
Map being recorded by this event.
– Legend: Adds a legend for the
Map being recorded by this event.
- Legend – depending on which maps were selected for this event, and how many legends they have, you can choose 'All' or specific legends from this drop-down list.
- Title – enter a 'Title'; choose 'Text Colour' and 'Font'
- Units – enter 'Units'; choose 'Text Colour' and 'Font'
- Labels – choose 'Text Colour' and 'Font'
- Contour – select 'yes' or 'no' to show or hide contour lines; choose 'Contour Line Colour'
- Background – choose a 'Background' colour and add a value for 'Background transparency' (0 is opaque)
 – Graph: Select a graph from the
drop-down list labelled 'Value' in the 'Graph name' row.
– Graph: Select a graph from the
drop-down list labelled 'Value' in the 'Graph name' row.
- To change the background colour of the video, select a colour from the drop-down palette labelled Background Colour.
- You can also align the
components in relation to each other; see
Aligning AVI components for details.
 – Align left: Select at least two
items and click to align their left sides.
– Align left: Select at least two
items and click to align their left sides.
 – Align right: Select at least
two items and click to align their right sides.
– Align right: Select at least
two items and click to align their right sides.
 – Align top: Select at least two
items and click to align their top sides.
– Align top: Select at least two
items and click to align their top sides.
 – Align bottom: Select at least
two items and click to align their bottom sides.
– Align bottom: Select at least
two items and click to align their bottom sides.
 – Equal widths: Select at least
two items and click to make them the same width.
– Equal widths: Select at least
two items and click to make them the same width.
 – Equal heights: Select at least
two items and click to make them the same height.
– Equal heights: Select at least
two items and click to make them the same height.
 – Centre: horizontally
- To delete a removable item, click to select it and press <Delete>.
- Click OK to save Layout settings.