Setting Direction Modifier Parameters
This procedure assumes you have already drawn a Direction Modifier and the 'Edit Direction Modifier <name>' dialog box is displayed.
To set Direction Modifier parameters:
- Enter a name for the Direction Modifier in the Name box (or leave it as it is if you are happy with the existing name).
- In the Action portion of
the dialog, select one, two or all of the following options, depending on how
you want the Direction Modifier to affect Entities:
- Change Entity Type to – select an Entity or Supply Type from the adjacent drop-down list.
- Change target – you will need to link the Direction Modifier to other targets for this to work. If you choose this, you will need to select either Specify Links or Revert to final destination. If you choose the former, you will need to specify links on the Links tab; if you choose the latter, Entities will continue to their Final Destination.
- Change final destination – you will need to add Final Destinations to the Direction Modifier for this to work.
- In the Scope portion of
the dialog, enter a percentage value between 0 and 100 in the box labelled
Percentage of entities to affect.
- For Direction Modifiers associated with Availability Profiles, percentages apply to the numbers of Entities within them.
- For Direction Modifiers associated with Event Profiles, percentages apply to the numbers of Entities specified by their Event Profiles every time-step, regardless of the number of Entities in the Direction Modifiers.
- Select a Data Profile from the drop-down list labelled Profile.
- To have this Direction Modifier to ignore entities already affected by this or other Direction Modifiers:
- To apply conditions to the
Direction Modifier, check the box labelled use condition to enable the
Condition tab. See
Conditions in
Models and in particular, "To set up a Condition:" in
Setting up
Conditions for further information.
- To apply any restrictions to the condition, enter values for the following restrictions (details in Restrictions):
- Click on the Entity Filter tab and complete the Filtering parameters (for further information on filtering, see Specifying Filter Settings).
- Click on the Links tab and complete the link details (for further information, see Linking Methods).
- If applicable, click on the Target Rules tab and set up the appropriate rules. See Setting Target Rules for full instructions.
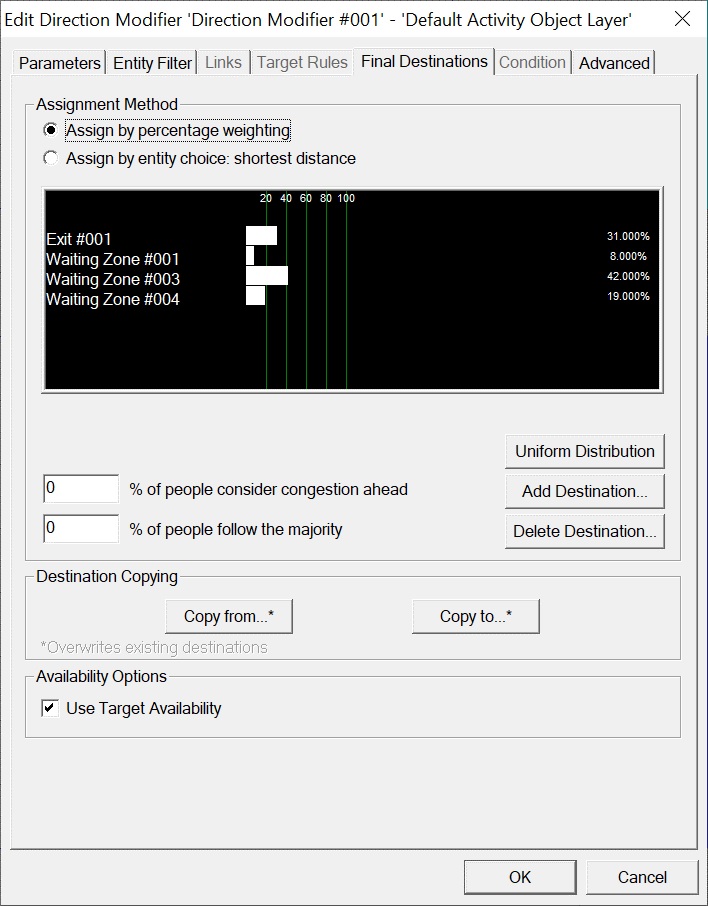
- If you checked the box labelled Change final destination earlier, click on the Final Destinations tab and click the Add Destination button, otherwise proceed to step 15.
- Expand the object trees within the dialog box and select one or more destinations (press and hold the <Ctrl> key while clicking to select more than one).
- Click OK to add the destination(s).
- If you want to distribute Entities evenly across your destinations, click Uniform Distribution. If you want to input the distribution manually, click next to each destination name and drag the distribution bar to set the percentage (they must equal 100%).
- Click OK to return to the main Parameters tab.
- Click Apply or OK to save the parameters.