Publishing an iModel
To create an iModel, select Home > Model Import/Export > iModel Export once the desired scenario and time-steps have been selected.
When a selection is made and confirmed, the following dialog opens with the defaults set so that all elements and properties are included in the iModel.
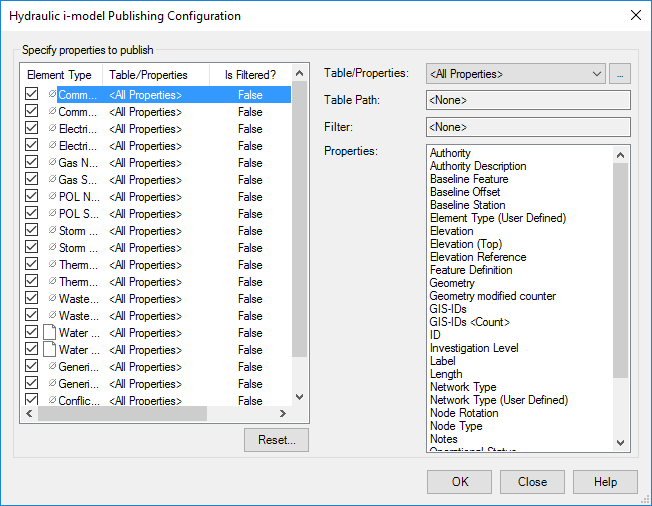
The top left pane is a summary of this element types are to be included in the iModel. If a box by the element type is checked, that element type is included. The Table/Properties column reflects the selections on the right side of the dialog in terms of which elements and properties are included.
The user will usually not need to include all element properties in the iModel. The right side of the dialog is to identify which properties of the elements are going to be included in the iModel. The default is "all properties". If the user wants to only include a subset of properties, the user should create a flex table with only those properties and select that flex table from the drop down list. Because it is possible to have multiple flex tables with the same name (e.g. Pipe Table can be a predefined table or a Hydraulic Model table), the user can explicitly state the table path (e.g. Tables - Predefined or Tables - Hydraulic Model). If the flex table is filtered, the filter is displayed in the Filter box and in the left pane, the Is Filtered column is set to True for that element type.
The Properties box on the right side of the dialog shows the properties that are imported for that element type.
When all settings are established for all element types, the user picks OK.
Upon starting the publishing, the user is asked for the file name for the .dgn file that will contain the iModel. The user names the file and path as with any other Windows application.