Setting- up input/output files
Input Files
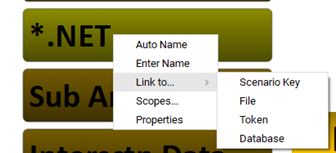
There are different ways of setting-up input files to a program:
- Right-click on the input file
- The
Link to Scenario Key window will open:
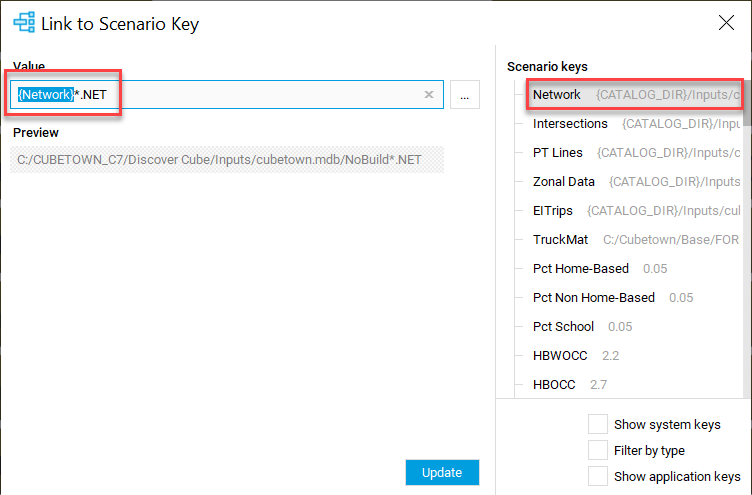
- Double click on the desired Scenario key on the right to select it.
- Click Update.
Tokens (@...variable_name…@) are global variables only valid during a model run, which are called in the model script. To link a program input to a token:
- Right-click on the input file
- The Link to Token window
will open:
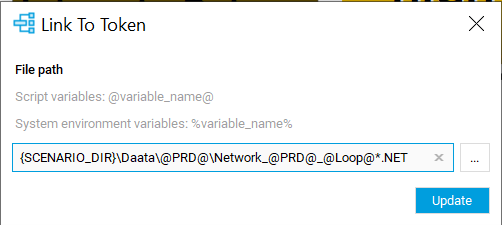
- In the box, enter the strings with any token which creates a reference to the input file to be liked.
- Click Update
To link outputs to inputs inside the same application group:
- Click on the output file box.
- Hold the mouse button and drag it to the input file box of the target program
- Release the mouse button.
This should create a visible link between the two programs:
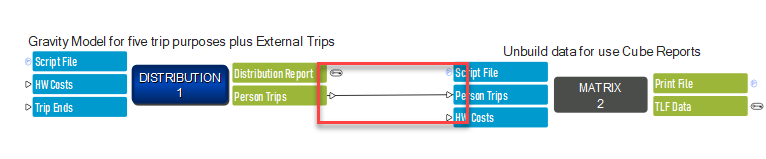
To Remove the link:
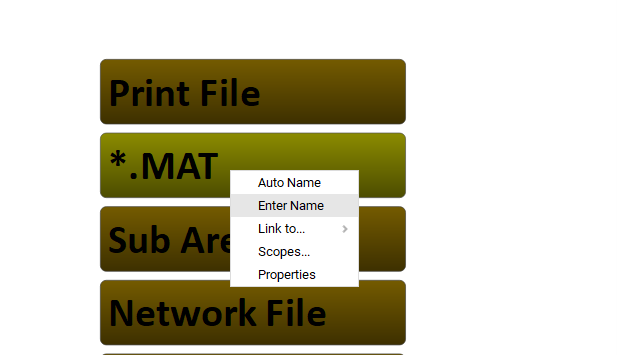
Output Files
To set-up output files to a program:

Note: The auto file naming uses eight-character types to define a name for the file and prompts the user with a default location for saving the file. This location corresponds to the same as that of the application. If needed users can opt to choose a different location.
This tool is commonly used for setting up the standard print file (.PRN) of the program. It is also used for output files which are intermediate and are overwritten during different scenario runs.
The new file option lets the user, name the file and choose
the destination folder
Making a file scenario specific lets the user set-up the output location of the file to be the scenario folder. This type of set-up is used for final outputs and other files with important output analysis data.
1. Right-click on an already named output file
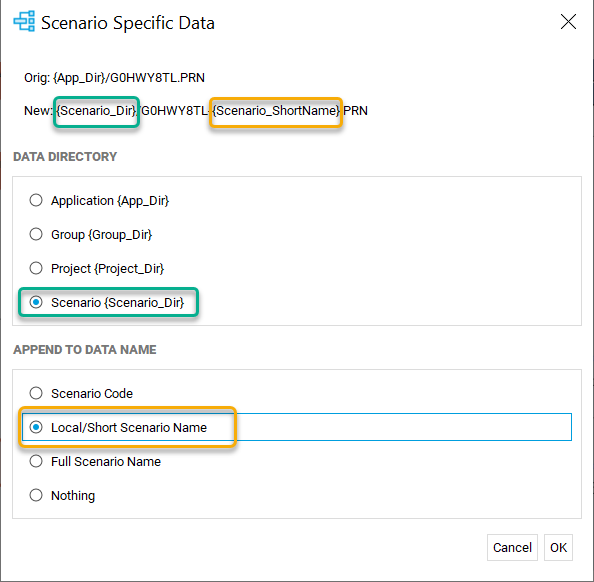
2. Select the desired Data Directory:
- Application/group directory: Stores the output data in a fixed location (path defined in application/group).
- Project directory: Stores the output data in the project path.
- Scenario directory: Stores the output data in a project subdirectory which is the scenario directory.
3. Select the desired Data Name option
4. Click OK
Linking output files to scenario keys and tokens work the same as linking input files. See above