Importing Network Data
CUBE 7 introduces a new database format network with support for shapes and data synchronization across the different network components such as transit, non-transit, turn penalty, junction and toll set data. The following sections cover how to import your CUBE 6 highway, transit, and non-transit network data to CUBE 7 database.
Import CUBE 6 .NET highway network
- Open CUBE
toolbox:

- Double-click and open the
tool
Convert Network from CUBE 6 NET to CUBE 7
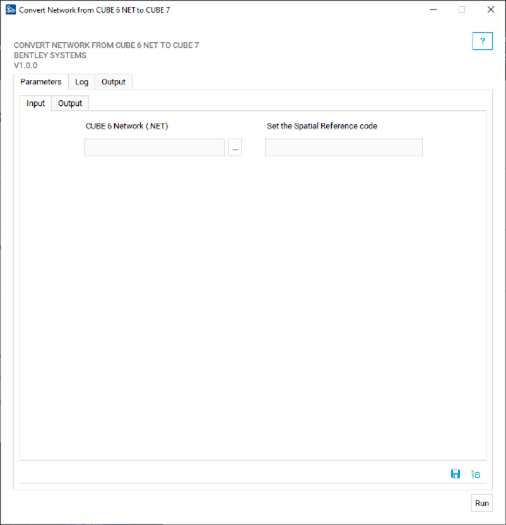
- Input CUBE 6 Binary Network File (*.NET) containing the network that you want to import to CUBE 7 database
- Spatial reference ID of the input network. If not provided (empty), the tool will use the default EPSG:3857 WGS 84. The spatial reference used here should be the same as the one for the original source, from which the network is built. This is usually a standard spatial reference used by the GIS data in the network region. For a list of supported spatial reference ids, please refer to https://spatialreference.org/. Having the correct spatial reference will make sure that the network is positioned in the correct location and scale on your maps. It is important to make sure that you use a geographic spatial reference if your network coordinates are in degrees or a projected spatial reference if otherwise.
- Path to an existing database or a new database.
- Name of the output network
- Click Runto start the import process
The Output tab will show the results of the import process
Import CUBE 6 True Shape/Geo-database highway network
If you have a CUBE 6 native format network (.net) with true shapes or a geo-database (.mdb/.gdb) network, you can import the network into CUBE 7 database with the existing link shapes.
CUBE 6 .net files with true shape: Open the network in CUBE 6 along with true shape turned on and export the link and node layers as shape files.
CUBE 6 geo-database network: From the CUBE 6 data manager, export the link and node layers of the highway network into link and shape files.
The steps below show how to build a CUBE 7 network from the link/node shapes exported from CUBE 6.
- From the toolbox, open the
Build CUBE Network From Shape Files
tool.
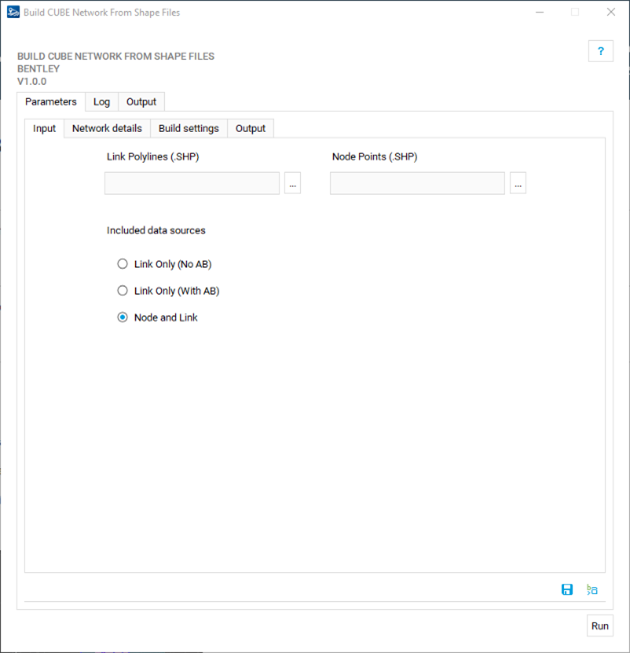
- Browse and select the network link shape file (.shp)
- Browse and select the network node shape file (.shp)
- Select Node and Link
- The tolerance used for grouping nodes. Use a very low value such as 0.000001. Setting this parameter to a very low value will make sure that nodes which are close together are not grouped into one node.
- Enter a number for the starting highway node (non-centroid nodes). This value should be higher than the maximum number of zones in the network.
- The maximum zone numbers in the network.
- : Enter a spatial reference id if your link and node shapes do not include the projection information. For a list of supported spatial reference ids, please refer to https://spatialreference.org/
- Keep this option unselected. If you select this option, the imported CUBE 7 network will not include the link and node attributes from the original network.
- Path to an existing database or a new database.
- Name of the output network
- Click Run to start import process
Import Transit System Data
- From the toolbox, open the
Convert PT System File from CUBE 6 to
CUBE 7tool
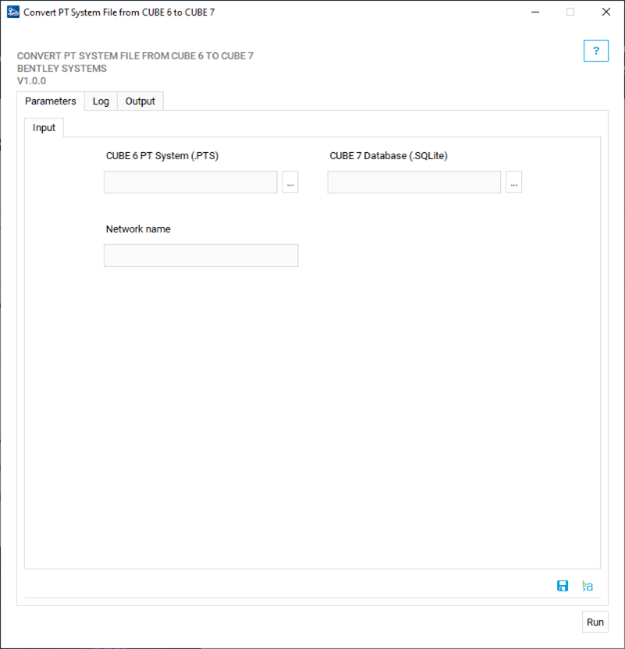
- Browse and select the CUBE 6 PT System file (*.pts)
- Browse and select the existing CUBE 7 database
- Enter the name of the existing CUBE 7 network
- Click Run to start import process
Import Transit Line Data
- From the toolbox, open the
Convert PT Lines from CUBE lin to CUBE
7
tool.

- Browse and select the PT Line file (*.lin). If you have the network in a CUBE 6 geo-database, export it to a line from Data Manager in CUBE 6.
- Browse and select the existing CUBE 7 database.
- Enter the name of the existing CUBE 7 network.
- Enter the name of the new transit layer in the CUBE 7 network.
- Click Run to start import process
Import Transit Leg Data
- From the toolbox, open the
Convert NTL from CUBE 6 to CUBE 7
tool.

- Browse and select the PT Transit leg file (*.ntl). If you have the network in a CUBE 6 geo-database, export it to a line from Data Manager in CUBE 6.
- Browse and select the existing CUBE 7 database.
- Enter the name of the existing CUBE 7 network.
- Enter the name of the new non-transit layer in the CUBE 7 network.
- Click Run to start import process