Scenario Manager is the panel in Project Explorer that
allows to visualize and manage the different scenarios available in a project
in a tree-structure.
Use Scenario Manager to:
- Drag and drop any
application to move it inside Scenario Manager.
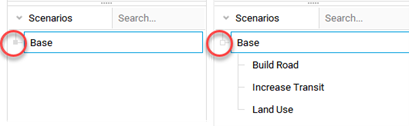
- Expand and Collapse child
scenarios:
- Click on the tree node
(small rectangle) on the left of the Scenario name to expand(unfilled) and
collapse(filled) child scenarios.
- Right-click on the
parent Scenario and select either the Expand All or Collapse All options
- Add a new scenario:
- Right-click on the
scenario
- Rename it and hit Enter to
save the changes.
Tip: CUBE
will create a child scenario when selecting Add Scenario. To add sibling
scenarios you need to add one in the same level as the parent.
- Once a scenario has been
created, the user can open it by either:
- Double-clicking on the
scenario
-
Right-click
- Rename a scenario:
- Click on the scenario’s
name and rename it.
- Right-click on the
scenario
- Right-click on the
scenario> Remove
Tip: As a
shortcut hit the
DEL key to remove it.
- Select the instances of the
scenario to be removed in the dialog box:

Selecting the
Scenario box will remove the scenario from the tree, while selecting the Files
box will remove it from the disk.
- Click on
Delete
- Make a copy of a scenario:
- Right-click on the
scenario and select Duplicate
Tip: Use
CTRL+D as a shortcut to duplicate it.
- The duplicated version
of the scenario will be named after the original one and followed by an index
describing the order of generation.
- Explore the file directory:
- Right-click on a
scenario
to open the File Explorer folder of the corresponding scenario.
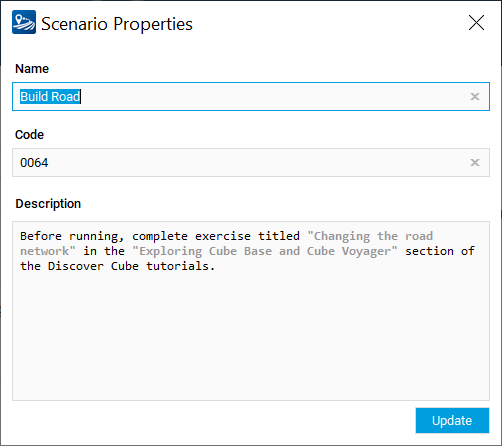
- Access a Scenario’s
properties:
- Right-click on the
scenario name
- The Scenario Properties
window allows to rename the scenario, change its code and description.