Clash Results
To view clash job results, from the Task-based Tools zone, select the Clash Detection tool. The Clash Detection screen opens.
If you have created a clash job, the clash job name
displays in the list in the Clash Jobs tab in the Content Management zone on
the middle left. The More Options
 icon displays to the right of
each clash job name in the clash job list. When you select the More Options
icon, you can select Edit which takes you to the
Edit
Clash Job screen for the active clash job and allows you to modify the
clash job. You can also select Delete to delete the clash job, and you can
select Share to share clash jobs between devices or with other users in your
CONNECTED Project. When a clash job is shared, the Shared
icon displays to the right of
each clash job name in the clash job list. When you select the More Options
icon, you can select Edit which takes you to the
Edit
Clash Job screen for the active clash job and allows you to modify the
clash job. You can also select Delete to delete the clash job, and you can
select Share to share clash jobs between devices or with other users in your
CONNECTED Project. When a clash job is shared, the Shared
 icon displays to the left of the
clash job name. You can also select Process to process the clash job. When you
have processed the clash job, the Clash Jobs tab displays information about the
clash job, including the number of clashes.
icon displays to the left of the
clash job name. You can also select Process to process the clash job. When you
have processed the clash job, the Clash Jobs tab displays information about the
clash job, including the number of clashes.
Viewing Clashes
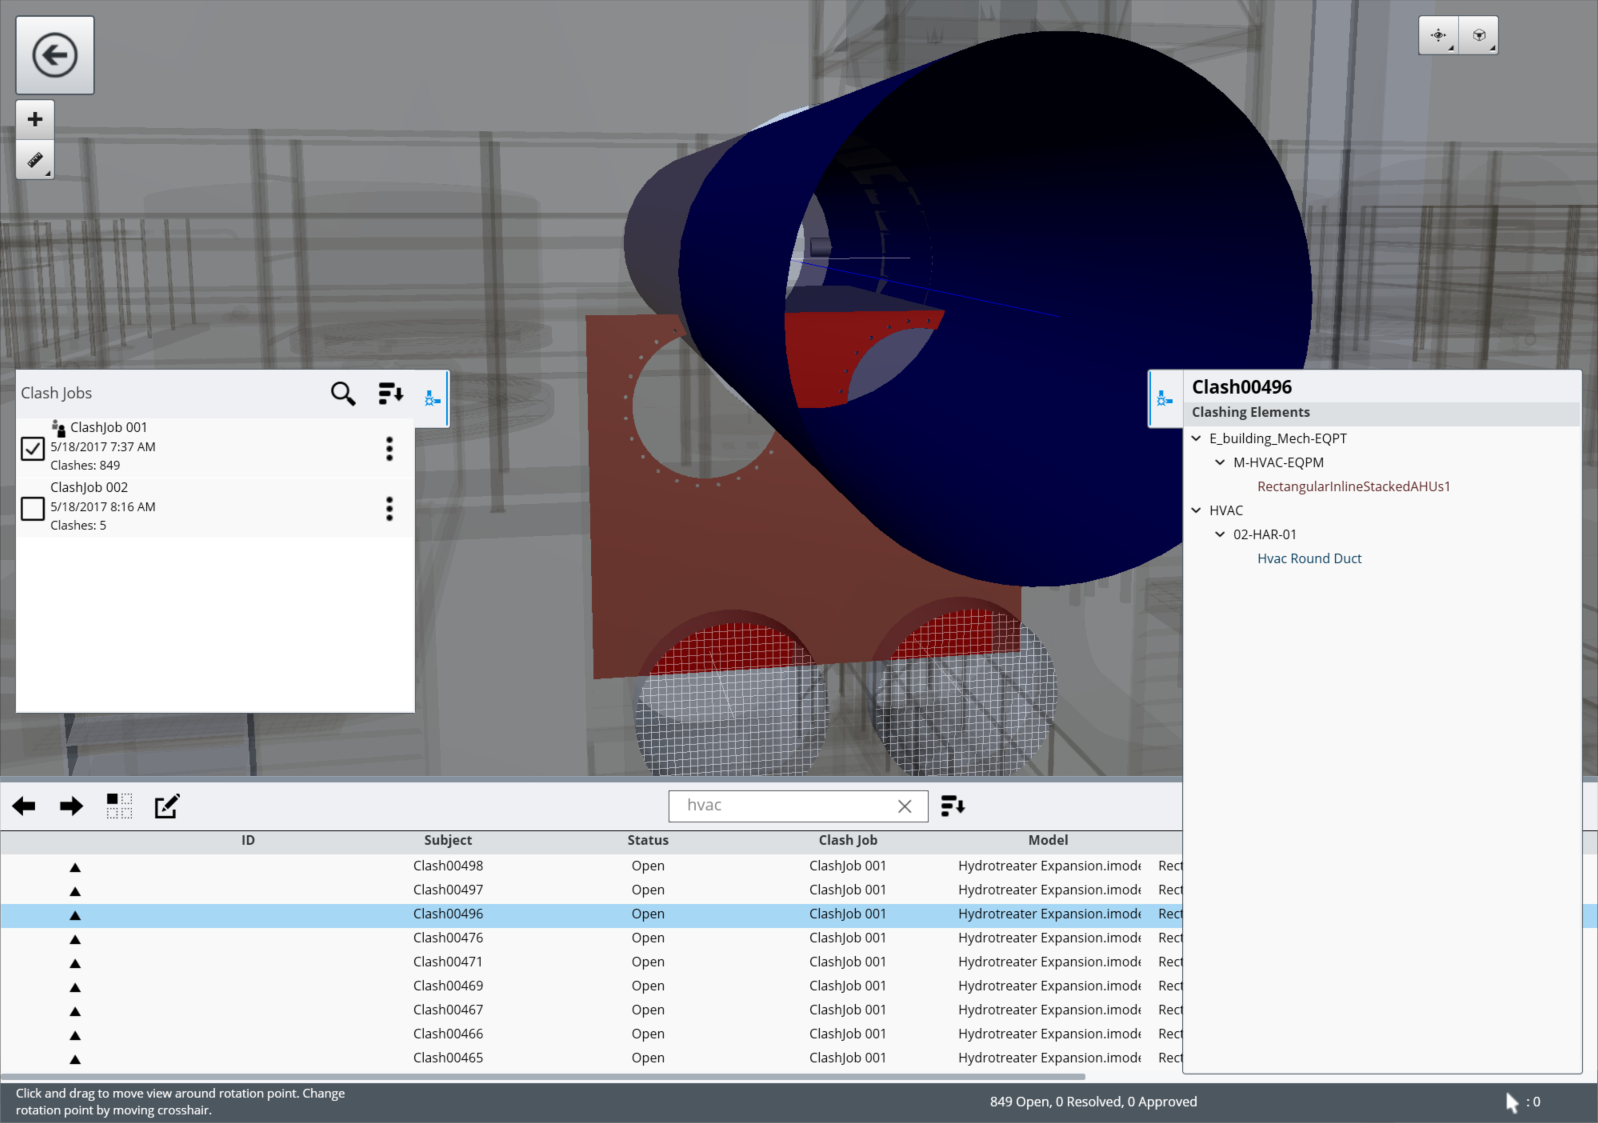
To view the clashes for a processed clash job, first make
sure the clash job is enabled. A checkmark displays next to enabled clash job
names in the Clash Jobs tab. If the checkmark does not display, select the
clash job name to enable the clash job. The clashes for all enabled clash jobs
display in the clash list on the bottom edge of the screen. Each clash issue
has a set of editable fields, and may contain redlines, attachments, and
comments. From the toolbar of the clash list, you can search the clash list or
select the Sort icon to select how you want to sort the clashes. You can also
move through the clash results one at a time by using the forward
 and back
 icons. To view a clash result by
itself in the view, select the Isolate Clash Result
icons. To view a clash result by
itself in the view, select the Isolate Clash Result
 icon. You can select any row in
the list which also selects the associated items in the view, zooms to the
items, and opens the Clash Properties tab in the File Browser zone from the
middle right, where you can see the location of the items in the model
hierarchy. Selecting an element of the model hierarchy displays information
about that element in the Properties zone in the bottom left.
icon. You can select any row in
the list which also selects the associated items in the view, zooms to the
items, and opens the Clash Properties tab in the File Browser zone from the
middle right, where you can see the location of the items in the model
hierarchy. Selecting an element of the model hierarchy displays information
about that element in the Properties zone in the bottom left.
Synchronizing Clash Issues
 in the first column which means
that this clash result has local changes that need to be synchronized.
a newly-created clash result gets a unique ID number defined by the
project.
in the first column which means
that this clash result has local changes that need to be synchronized.
a newly-created clash result gets a unique ID number defined by the
project.
Editing Clash Issues
Select a clash issue and select the Edit
 icon. In the Edit issue dialog,
you can switch between the different tabs at the top of the form. Once the
changes are made, select the Done button.
icon. In the Edit issue dialog,
you can switch between the different tabs at the top of the form. Once the
changes are made, select the Done button.
Clash Status
From the Details tab of the Edit issue dialog you can set the status of a newly-created clash issue to Open or Accepted. The status automatically changes to Resolved when a clash is no longer detected. If a Resolved clash issue changes, the status changes to Follow Up. When a clash issue is marked Follow Up, you can set the status to Open or Accepted, or keep the status as Follow Up.
Adding Attachments
From the Attachments tab of the Edit issue dialog, select
the Add "+" button. The Capture Screen mode opens. When creating a screen
capture of the view, first you need to orient the view for the capture. While
in the Capture Screen mode, you can orient the view by using standard mouse and
gesture controls or by using the tools in the Tools Menu. Once the view is
oriented the way you want it, select the Capture button
 in the upper right. Selecting the
Back button in the Tools Menu takes you back to the Edit issue dialog.
in the upper right. Selecting the
Back button in the Tools Menu takes you back to the Edit issue dialog.

Once the view is captured, the Annotate Attachment screen opens. Here you can add redlines to the attachment before saving it. From the Tools Menu you can choose to draw free hand shapes, clouds or add text to the attachment. Selecting the Back button takes you back to the Capture Screen mode. Once you have made your annotations, select the Save button (checkmark icon) in the upper right to add the attachment to the clash issue.
