Customizing Toolbars and Buttons
Toolbar buttons represent Bentley HAMMER CONNECT menu commands. Toolbars can be controlled in Bentley HAMMER CONNECT using View > Toolbars. You can turn toolbars on and off, move the toolbar to a different location in the work space, or you can add and remove buttons from any toolbar.

To turn toolbars on
Click View > Toolbars, then click in the space to the left of the toolbar you want to turn on.
To turn toolbars off
Click View >Toolbars, the click the check mark next to the toolbar you want to turn off.
To move a toolbar to a different location in the workspace
Move your mouse to the vertical dotted line on the left side of any toolbar, then drag the toolbar to the desired location. If you move a toolbar away from the other toolbar, the toolbar becomes a floating dialog box.
To add or remove a button from a toolbar
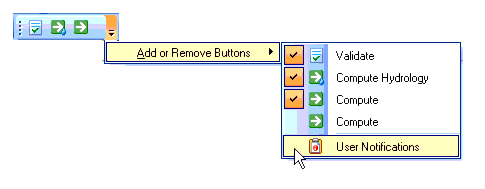
- Click the down arrow on the end of the toolbar you want to customize. A series of submenus appear, allowing you to select or deselect any icon in that toolbar.
- Click Add or Remove Buttons then move the mouse cursor to the right until all of the submenus appear, as shown as follows:
- Click the space to left of
the toolbar button you want to add. A check mark is visible in the submenu and
the button opens in the toolbar.
or
Click the check mark next to the toolbar button you want to remove. The button will no longer appear in the toolbar.