Manage Workflows
The Manage Workflows feature located within the Site Configuration branch of the Administration module allows an agency to determine all of the steps an inspection report or maintenance item will travel through until completion. Most agencies have a very specific way of processing their reports, and the Manage Workflows page makes it possible to bring those processes into AssetWise Inspections.
Creating a Workflow
To create a new workflow, click the New Workflow button in the top right corner of the screen. The following popup will appear:

Use the Workflow and Worfklow Description textboxes to enter a name and description for the new workflow. The Workflow Type dropdown determines for what process the workflow will be used.
Click the Save button to officially create the new workflow.
Workflow Stages
Once the workflow is created, workflow stages need to be added to signify the different steps in the workflow process. Select the Workflow Stages tab to view the existing workflow stages:

By default, AssetWise Inspections comes with 4 existing, un-editable workflow stages: In Progress, Awaiting Approval, Approve Final Report, and Completed.
The simplest of processes can often be achieved by using an In Progress > Awaiting Approval > Completed workflow. However, a workflow can be as simple or as complicated as desired. If the necessary workflow stages don't currently exist, click the New Workflow Stage button in the top right corner of the screen. The following popup will appear:
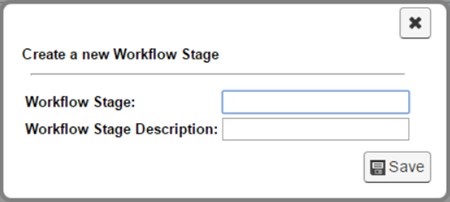
Use the Workflow Stage and Worfklow Stage Description textboxes to enter a name and description for the new workflow stage.
Click the Save button to create the new workflow stage.
Workflow Stage Security
Each workflow stage has role-based security that can be
determined by pressing the
 icon for the desired workflow
stage. This will open the following popup:
icon for the desired workflow
stage. This will open the following popup:
The Report Access Level dropdown determines whether the role's access is Full Control or Read Only for a report when it is in the current workflow stage.
The Can Assign To checkbox indicates that only users within the checked roles will be able to have a report in the selected workflow stage assigned to them.
Workflow Actions
In order for an item to move through the workflow's various workflow stages there must be workflow actions. Select the
Workflow Actions tab to view the existing workflow actions:

The most common workflow actions are Pass and Fail, but new workflow actions can be created by clicking the New Workflow Action button in the top right corner of the screen. The following popup will appear:
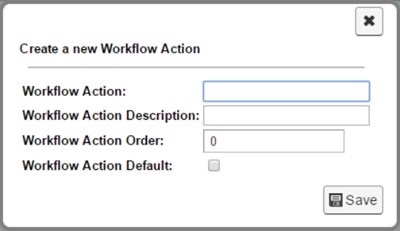
Use the Workflow Action and Worfklow Action Description textboxes to enter a name and description for the new workflow action.
Use the Workflow Action Order textbox to determine where the workflow action will appear in the list when a user needs to make a workflow action selection (starting with "0").
The Workflow Action Default checkbox indicates that this workflow action will be the default action selected when a user needs to make a workflow action selection.
Click the Save button to create the new workflow stage.
Building a Workflow
Once the workflow, workflow stages, and workflow actions have been created, the workflow must be built. Return to the Workflow tab and ensure that the newly created workflow is selected in the Workflow dropdown.
Attaching the First Workflow Stage

By default, the first workflow stage will always be "In
Progress." The first attached stage will actually be the second stage in the
workflow. Click the
 button to open the following
popup:
button to open the following
popup:
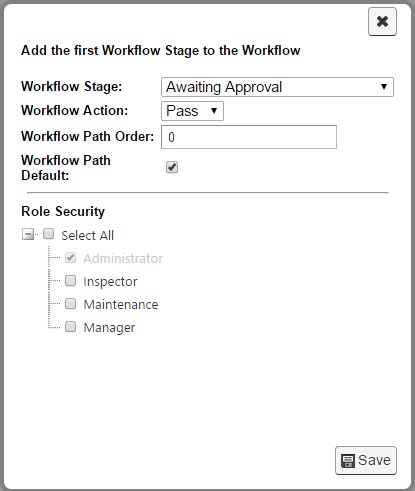
- Workflow Stage - Use the Workflow Stage dropdown to select the desired workflow stage to add to the workflow. If this is the first workflow stage being added, it will follow after the "In Progress" stage.
- Workflow Action - Use the
Workflow Action dropdown to determine what action must be taken while in the
prior stage to proceed to the stage being added.
- Example: If an In
Progress > Awaiting Approval > Completed workflow is desired, the
Workflow Action must be set to "Pass" when adding the "Awaiting Approval"
workflow stage so that a filled-out inspection report can proceed to the
"Awaiting Approval" stage.
Note: In almost all cases, the workflow stage following the "In Progress" stage will have a positive (forward-moving) action because there is nowhere else for the inspection report to go in the first workflow stage. Stages other than "In Progress" can have negative (backward-moving) actions that send the inspection report back to the previous stage.
- Example: If an In
Progress > Awaiting Approval > Completed workflow is desired, the
Workflow Action must be set to "Pass" when adding the "Awaiting Approval"
workflow stage so that a filled-out inspection report can proceed to the
"Awaiting Approval" stage.
- Workflow Path Order - Use the Workflow Path Order textbox to determine where the workflow stage will appear in the list when a user needs to make a workflow path stage selection (starting with "0").
- Workflow Path Default - If the Workflow Path Default checkbox is checked, that workflow stage will be pre-selected as the default workflow stage when a user needs to make a workflow path stage selection.
- Role Security - The Role Security checkboxes indicate whether or not a user within a specific role can submit a report from the current workflow stage to the stage being added.
- When the desired selections have been made, click the Save button to attach the workflow stage to the workflow.
Attaching Additional Workflow Stages
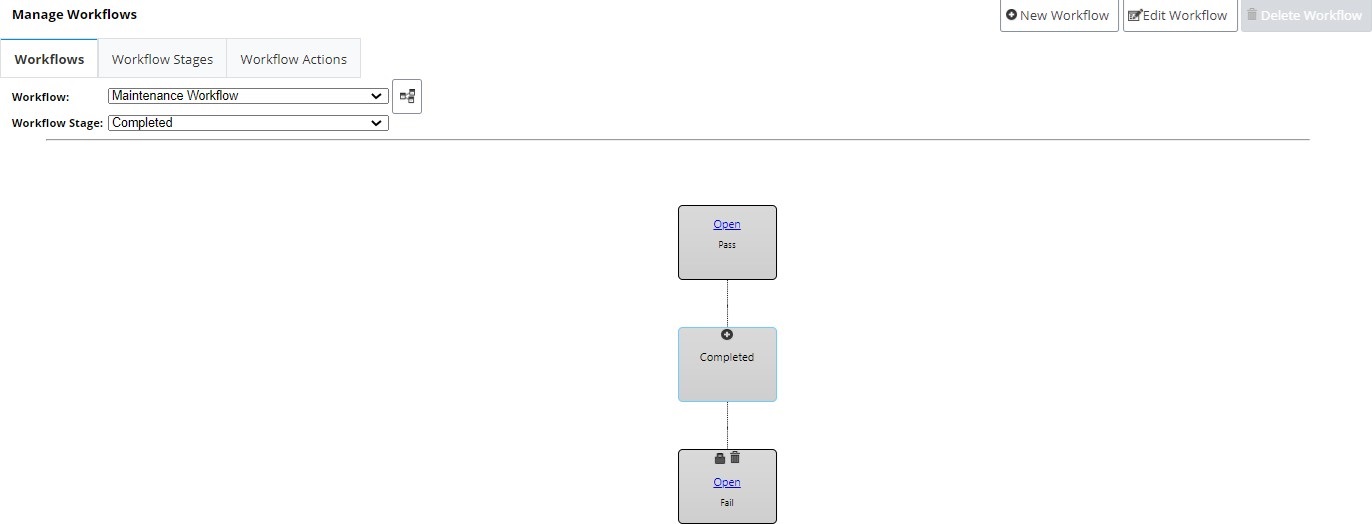
Once one workflow stage has been added to the workflow, the look of the page and process for adding additional workflow stages changes.

The Workflow Stage dropdown becomes available and selecting a stage from the dropdown displays all of the paths possible to and from that stage.
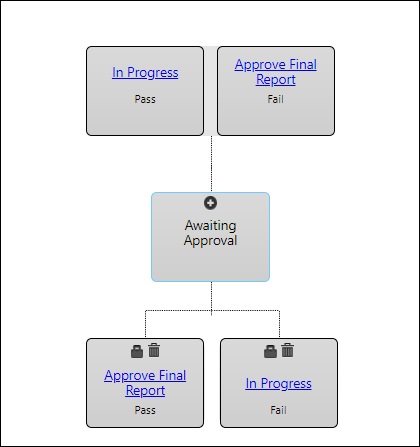
Workflow Stage Controls
There are a few different controls selectable from the workflow, including:
- Add Workflow Stage Use this icon to add a workflow stage to the currently selected workflow stage.
- Workflow Path Security Use this icon to edit the role security for the workflow path to which the icon belongs (this initially gets set when the workflow stage is added to the workflow).
- Remove Workflow Path Use this icon to remove the workflow stage to which the icon belongs.


The workflows that aren't currently selected but are connected to the selected workflow stage's path have hyperlinked names that will take the admin to that workflow stage.
Additional Manage Workflow Page Controls
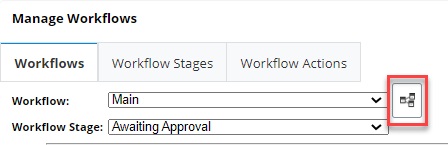
The Overall Workflow Chart button opens a new page that displays the entire workflow path with pass-only actions to give the admin an overall view of the workflow.
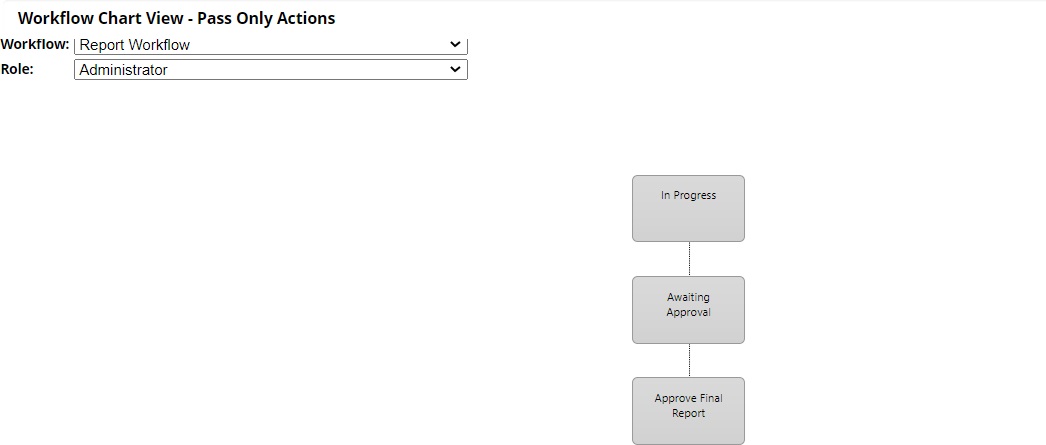
The Workflow dropdown allows the admin to change the workflow being viewed and the Role dropdown allows the admin to view the selected workflow based on the security for a specific role.
